Offline Circulation
Overview
Evergreen’s Offline Circulation interface allows staff to continue basic circulation functions during network outages or scheduled system maintenance. Transactions performed in offline mode are stored locally in your browser and can be uploaded and processed once connectivity is restored.
|
Read this documentation completely before any scheduled downtime. Proper preparation is essential for successful offline circulation. |
Preparation Steps
Before you can use offline circulation, you must complete these preparation steps while connected to the server:
Required Setup
-
Ensure you have access to your production server
-
Register your workstation on the computer and browser you intend to use
-
Log in from that browser at least once
-
Visit Search → Search for Patrons and perform a search
-
Select a user from the results and open the Patron Edit interface
|
These steps allow the offline interface to collect essential information such as workstation configuration and the patron registration form template. |
Accessing Offline Mode
Triggering Offline Mode
For offline circulation to load, your browser must either:
-
Be completely disconnected from the internet, or
-
Have its connection to the Evergreen server interrupted
Manual Methods
If you need to force your browser to show the offline circulation interface:
-
Firefox: Enable "Work offline" setting (under the File menu)
-
Chrome: Use a browser extension that can toggle offline mode
-
Any browser: Disconnect ethernet cable or disable wifi connection
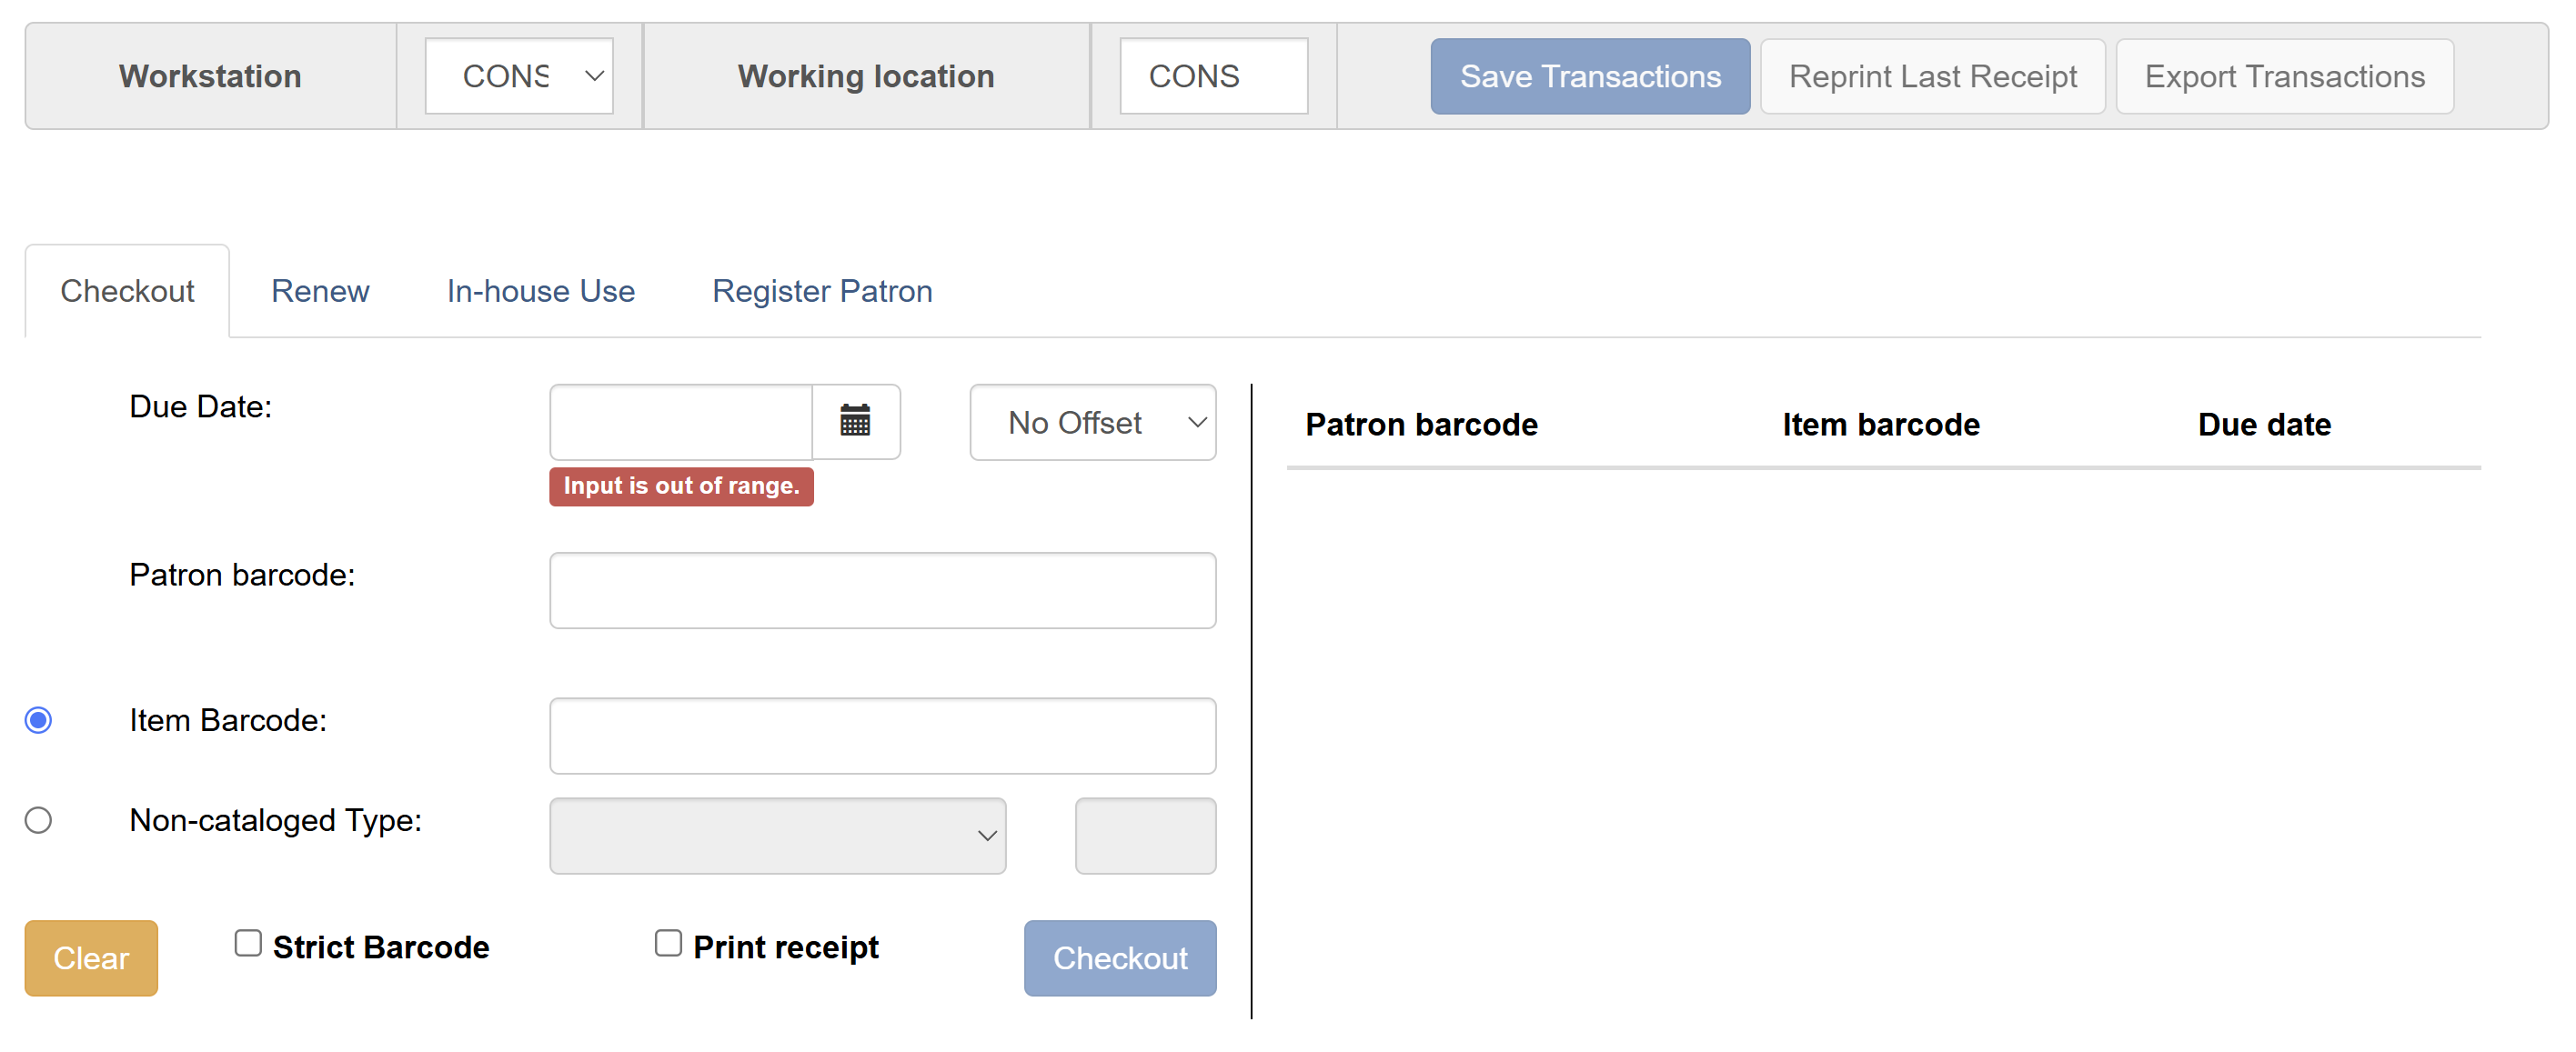

Checking Out Items
-
Click the Checkout tab
-
Optional: Check Strict Barcode if you want validation for patron and item barcodes
 Figure 3. Strict Barcode Option
 -
Set the due date:
-
Enter a date in the Due Date field, or
-
Select a date from the calendar widget, or
-
Choose an option from the Offset dropdown
-
-
Scan the patron’s barcode in the Patron Barcode field
-
Check out items:
-
Scan each item barcode in the Item Barcode field
-
Each item appears on the right with its due date and patron barcode
-
If typing barcodes manually, press Enter or click Checkout after each entry
-
-
Optional: Check Print Receipt to print a receipt
-
Click Save Transactions to complete the checkout process
|
|
Click Clear to reset the fields if you make an error. |
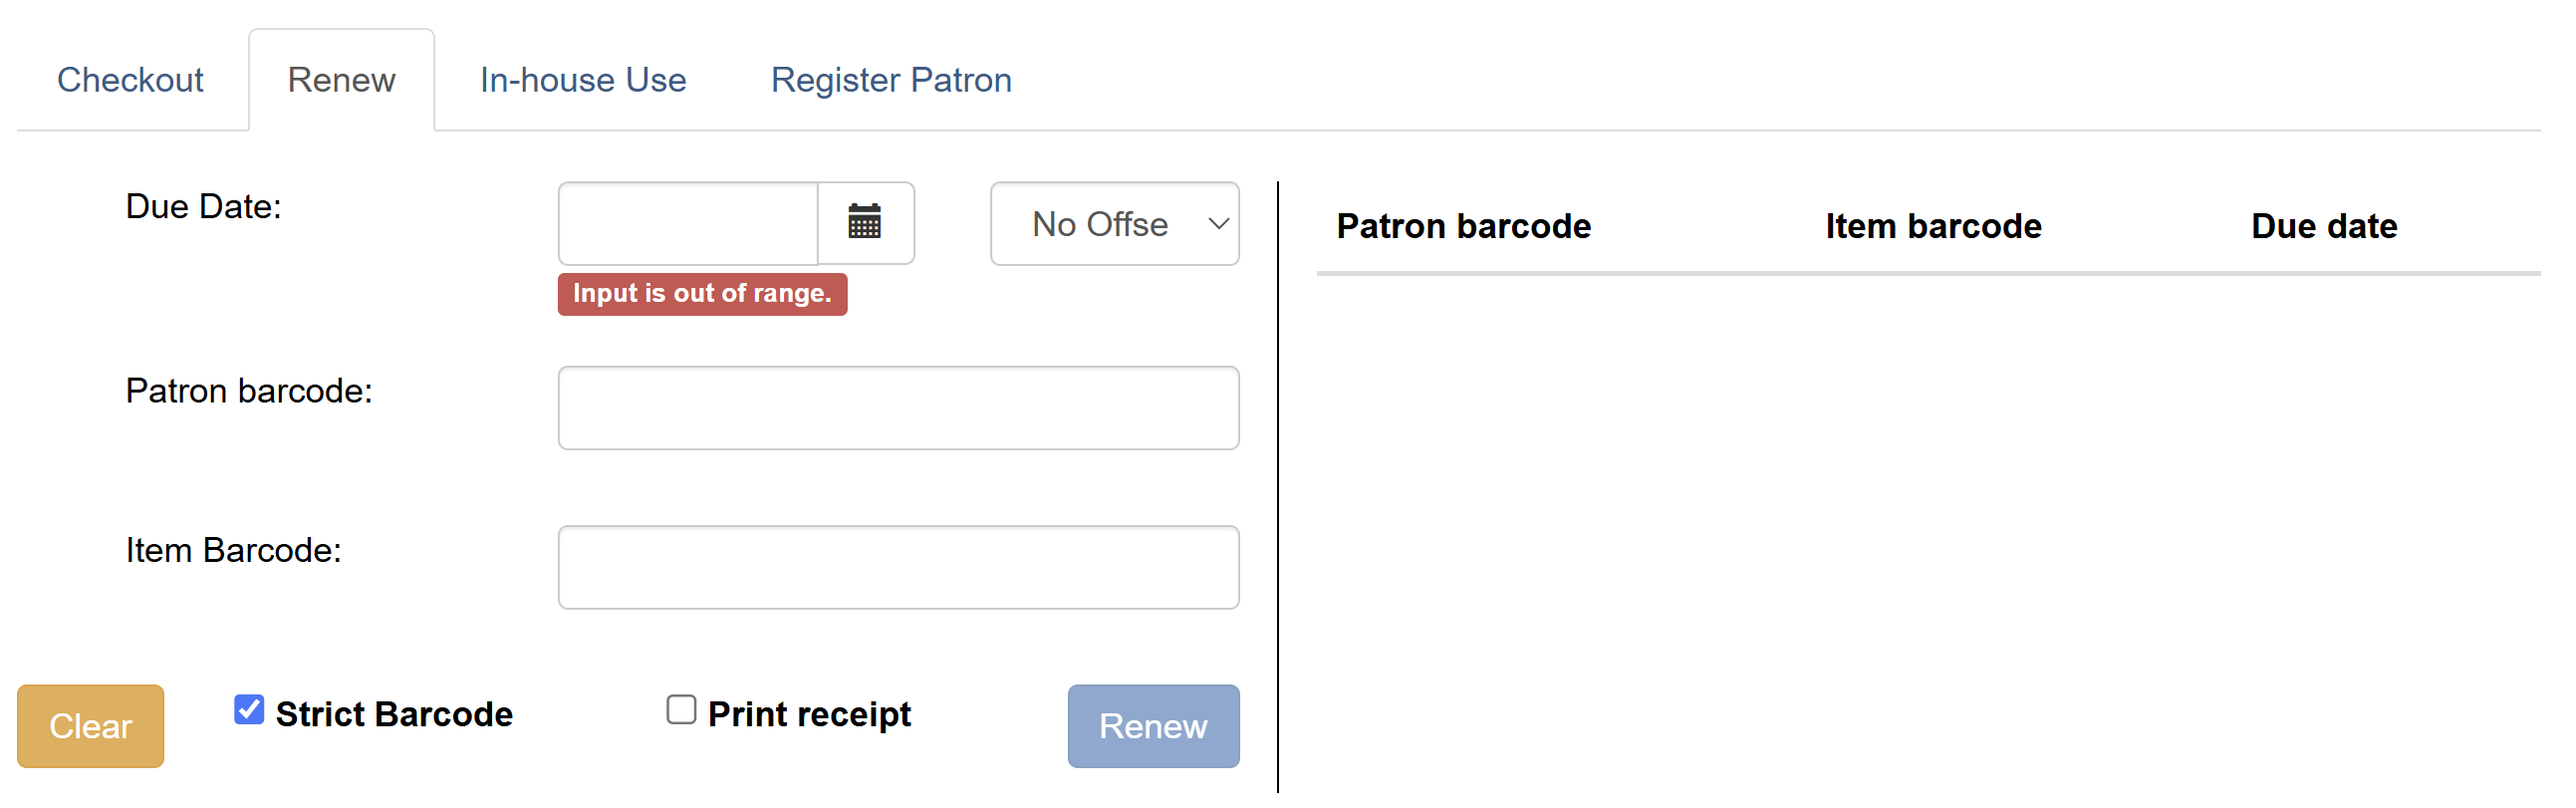
Renewing Items
To renew items, you need the item barcode. The patron barcode is optional.
-
Click the Renew tab
-
Ensure the Due Date value is correct
-
Optional: Enter the patron’s barcode in the Patron Barcode field
-
For each item to renew:
-
Scan the item barcode in the Item Barcode field
-
If typing, click Renew or press Enter after each item
-
-
Items appear on the right with barcode, due date, and patron barcode
-
Optional: Check Print Receipt to print a receipt
-
Click Save Transactions to complete the renewals
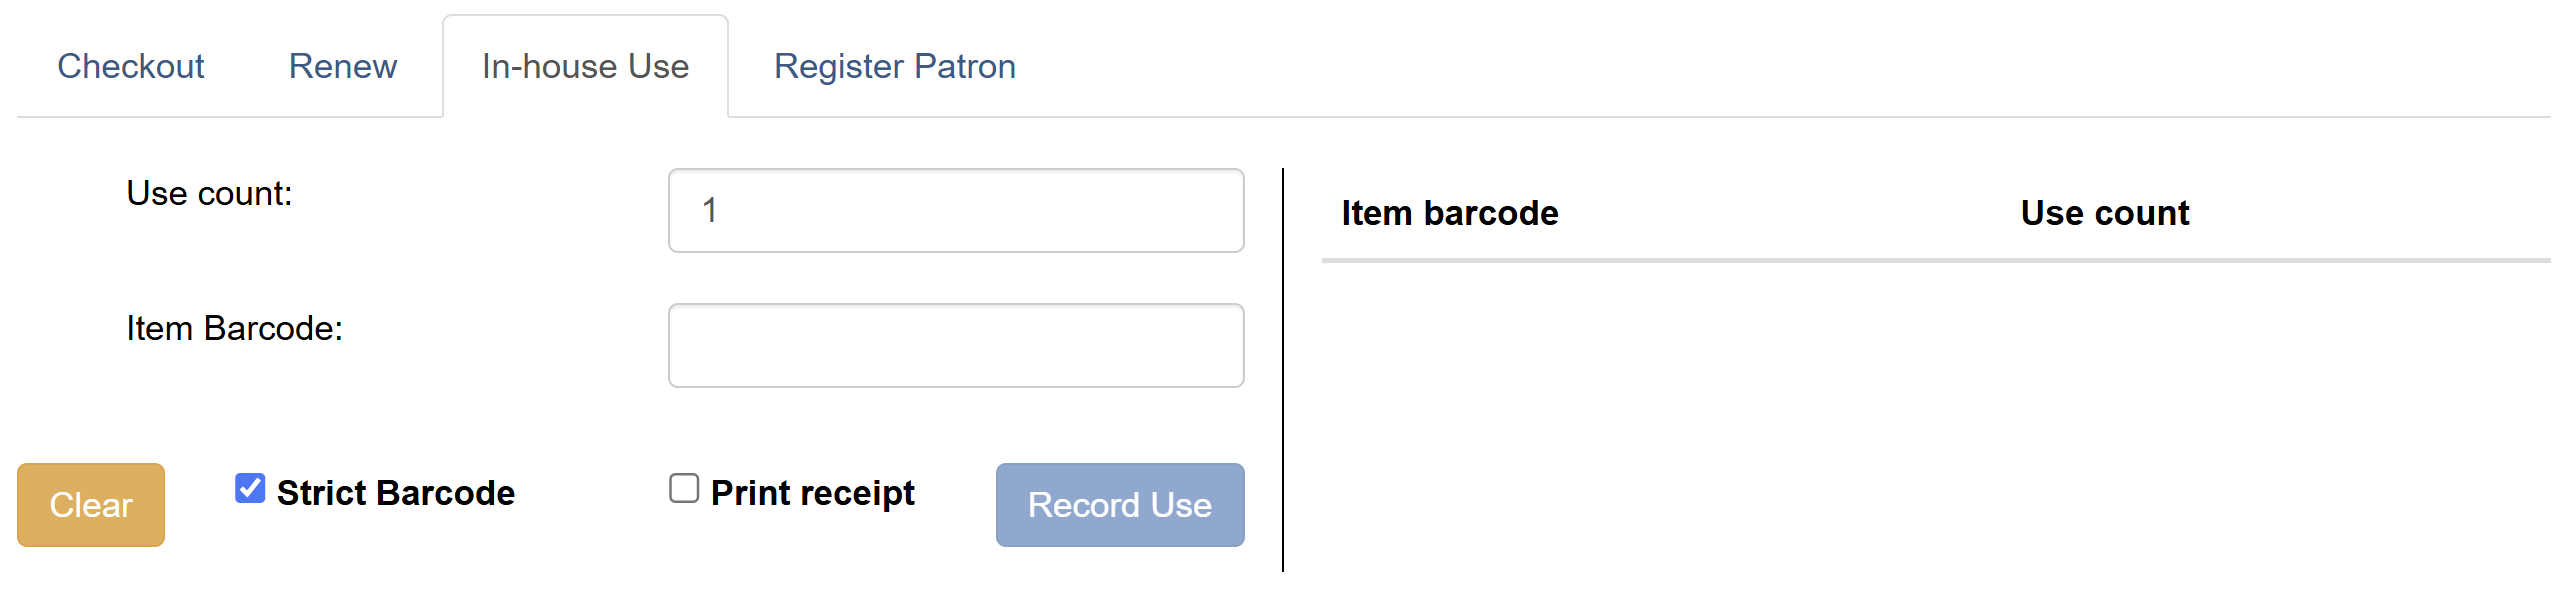
Recording In-House Use
-
Click the In-House Use tab
-
Enter the number of uses in the Use Count field
-
For each item:
-
Scan the item barcode in the Item Barcode field
-
If typing, click Record Use or press Enter after each item
-
-
Items appear on the right with barcode and use count
-
Optional: Check Print Receipt to print a receipt
-
Click Save Transactions to record the in-house use
Registering New Patrons
The offline patron registration form is similar to the regular interface with some limitations:
-
Statistical categories are not available
-
City and state fields will not auto-generate based on zip code
Registration Steps
-
Click the Register Patron tab
-
Click All Fields to see the complete registration form
-
Enter patron information in the form fields
-
Click Save in the top-right corner
|
|
You can check out items to newly registered patrons immediately, even while still offline. |
Managing Offline Transactions
Exporting Transactions
For extended closures, export your offline transactions for safekeeping.

Importing Exported Transactions
-
Log in to the staff client
-
Navigate to Circulation → Offline Circulation
-
Click the Session Management tab
-
Click Import Transactions
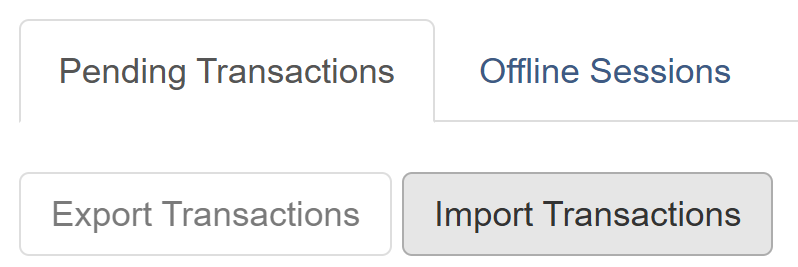 Figure 5. Import Transactions Interface
 -
Navigate to your saved
pending.xactsfile -
Select the file for importing
-
The Pending Transactions list populates with your imported transactions
|
Delete |
Processing Offline Transactions
Once connectivity is restored, you’ll see a message about unprocessed offline transactions waiting for upload.
Initial Setup
-
Sign in to Evergreen
-
Navigate to Circulation → Offline Circulation
-
Click the Session Management tab
-
The Pending Transactions tab shows all transactions recorded on that browser

Creating a Processing Session
-
Click the Offline Sessions tab
-
Click Create Session
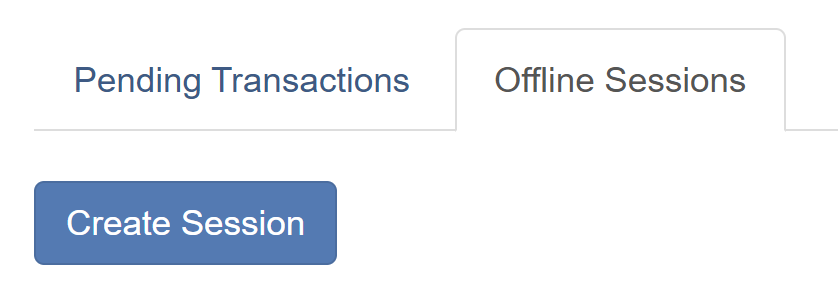 Figure 7. Create Session Button
 -
Enter a descriptive name (e.g., "Jan 15 Snow Day" or "Branch Power Outage")
-
Click OK/Continue

Your new session appears at the top of the Session List. Sort the list by clicking any column header.

Uploading and Processing
-
Click Upload to upload all transactions from the Pending Transactions tab
-
Watch the Upload Count increase
|
Upload transactions from each workstation to the same session. Click Upload on each workstation used for offline circulation. |
-
Once all transactions are uploaded:
-
Click Refresh to see the total Upload Count
-
Click Process to begin processing
-
Click Refresh again to monitor progress
-
Processing is complete when "Transactions Processed" matches Upload Count
-

Handling Exceptions
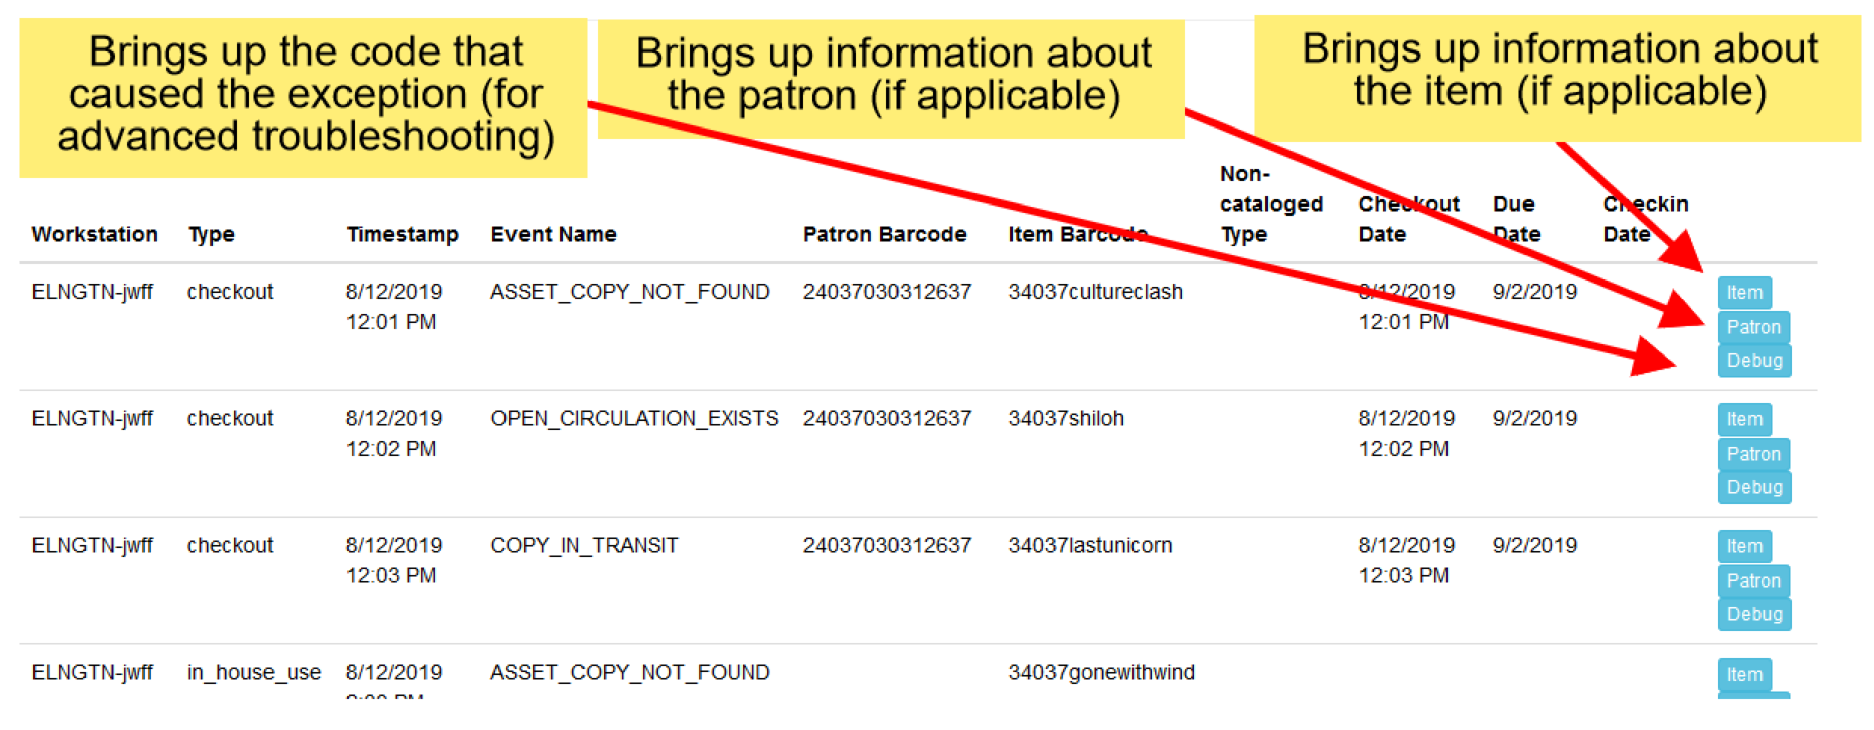
Exceptions are problems encountered during processing. View the Exceptions List at the bottom of the screen after processing completes.
Common Exception Types
| Exception Type | Description |
|---|---|
ASSET_COPY_NOT_FOUND |
Item barcode was mis-scanned, mis-typed, or doesn’t exist |
ACTOR_CARD_NOT_FOUND |
Patron barcode was mis-scanned, mis-typed, or doesn’t exist |
OPEN_CIRCULATION_EXISTS |
Item was checked out that had never been checked in |
COPY_IN_TRANSIT |
Item was checked out that was in transit status |
MAX_RENEWALS_REACHED |
Item has already been renewed the maximum number of times |
|
Staff with appropriate override permissions may have some exceptions (like MAX_RENEWALS_REACHED) automatically overridden. |
Investigating Exceptions
Each exception has buttons for investigation:
-
Item: Opens the associated item in a new browser window
-
Patron: Opens the associated patron in a new browser window
-
Debug: Shows the code that created the exception (for support staff)
Scenarios That Do NOT Cause Exceptions
-
Checking out an item with a different due date than its regular circulation period
-
Checking out overdue books
-
Checking out a reference or non-circulating item
-
Checking out an item belonging to another library
|
Hold Conflicts: An item on hold for Patron A but checked out to Patron B will not cause an exception. However, Patron A’s hold will be reset and retarget when the hold targeter next runs. Avoid checking out items on hold to other patrons. |