Running Reports
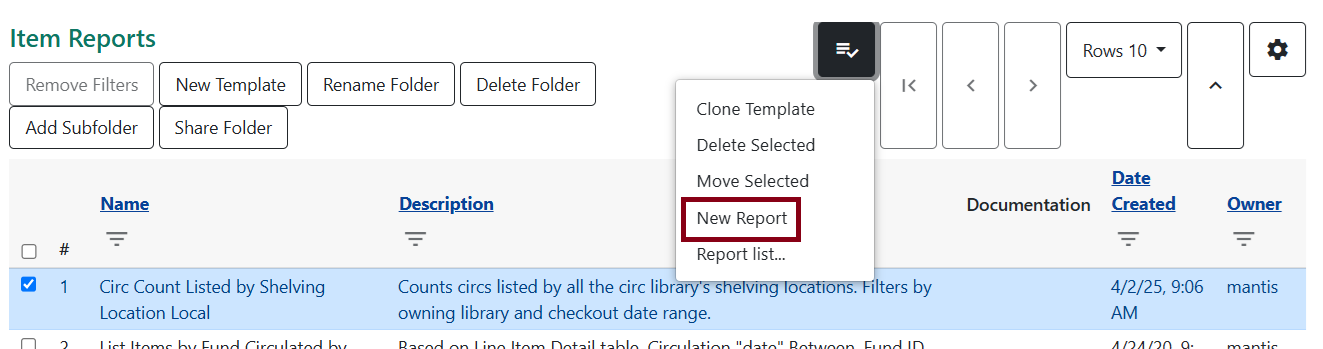
Start a New Report
Select the template you would like to run by clicking on the checkbox next to the template, going to actions, and select New Report.
Filters
This will bring you to the Filters tab of the report. In this example, we have two filters: circulating library and a date range for checkouts.
Your library should show by default under the tree like so.
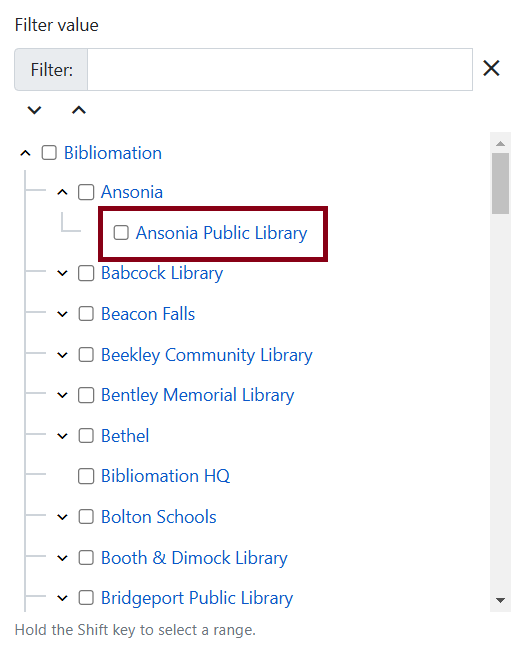
Select the library by checking it off.
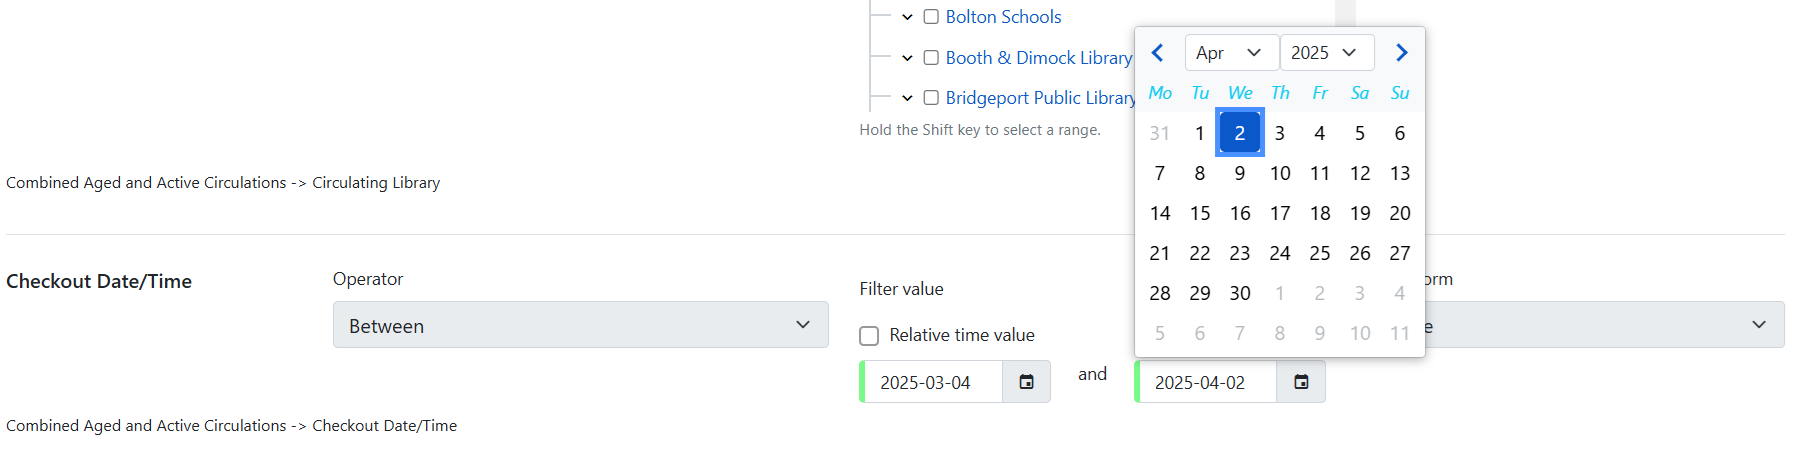
Dates can be filled out manually with a YYYY-MM-DD format or by selecting from the calendar picker.
If a template requires text, there will be fields for input. This is an example of a call number range with two fields to input for a range.

Here’s an example of publication year. This particular example will filter items that were published before 2008.

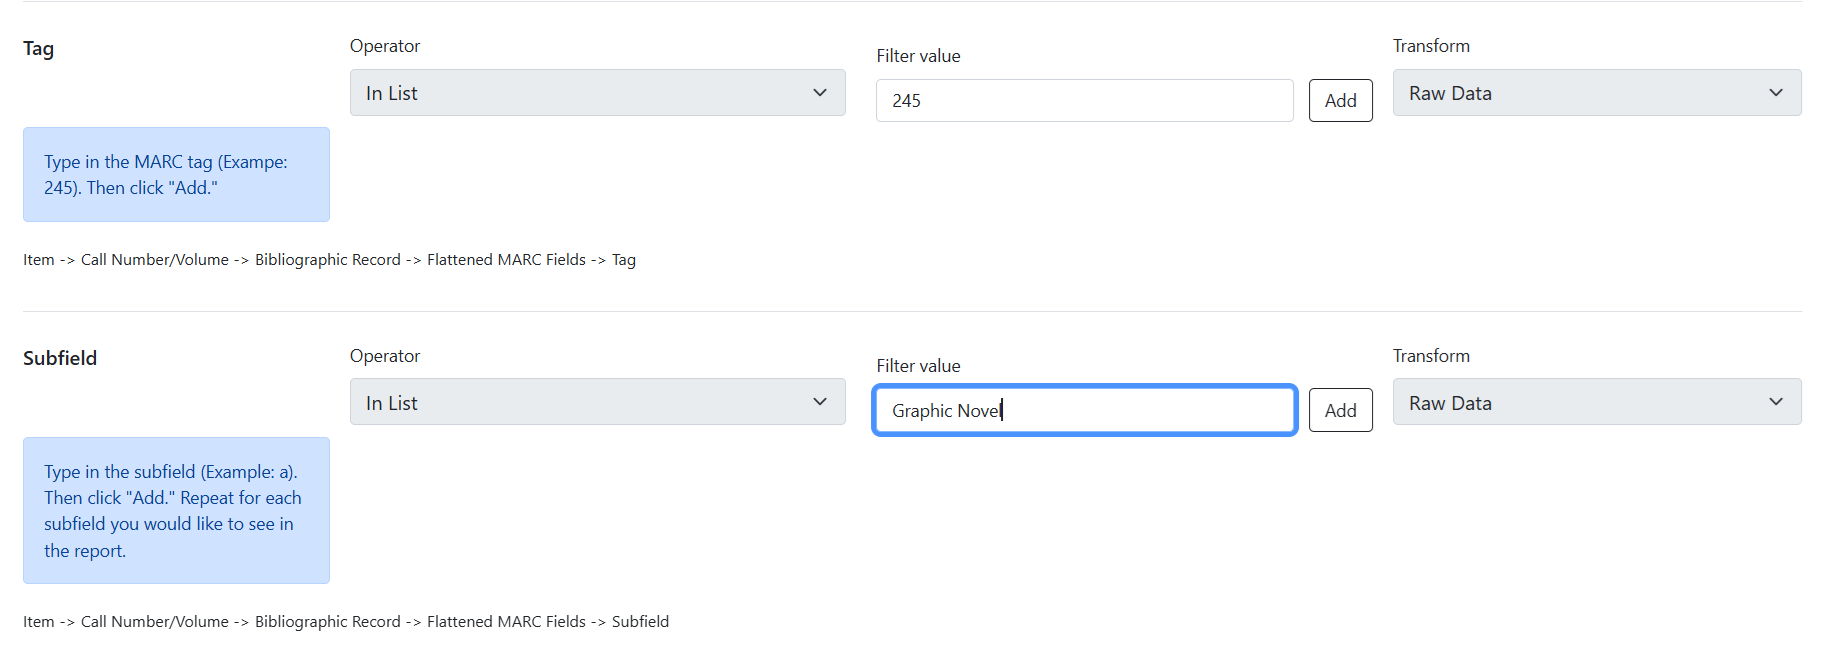
In some reports, there will be some notes to help you figure out what to place in the text fields. Below is an example to filter by graphic novel subfields within the 245 MARC tag.
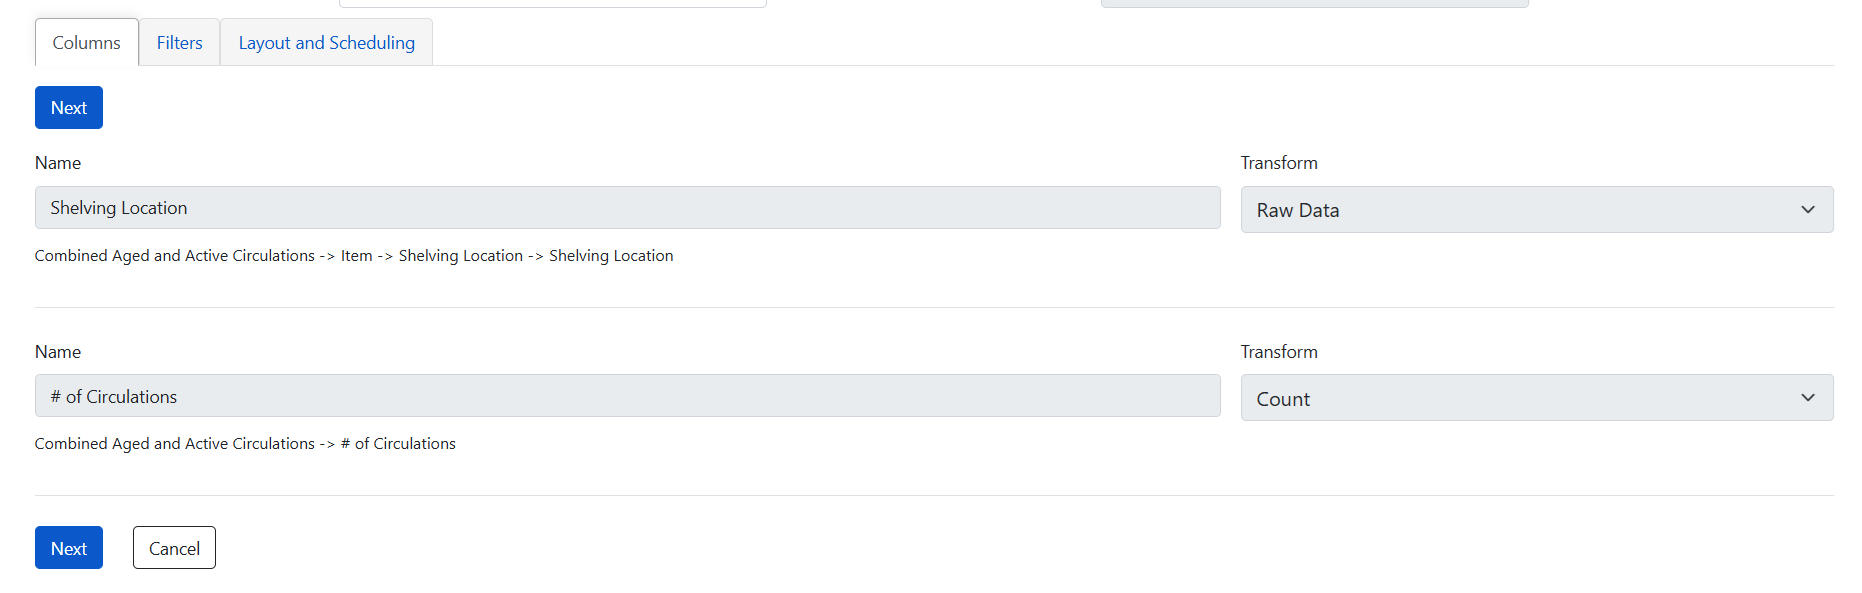
Columns
This tab simply shows the columns that will be displayed in the output. Some reports have more columns than others.
Layout and Scheduling
This last tab actually runs the report and sets up a schedule if you would like it to run recurringly.
Choose Output Format

You can choose your output format with the checkboxes on the left. HTML Output and CSV Output will be checked off by default. Most of the outputs Bibliomation staff sends to you will be in this format, but feel free to choose other options.
Next choose the report folder you would like the report to be saved in and then the output folder the output will be saved in. The report folder keeps a record of what filters were input to run the output, and the output folder contains the results of the report.
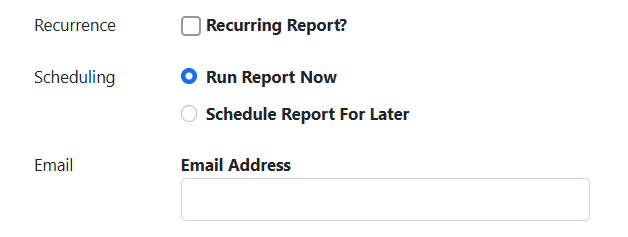
Run Now, Schedule, and Email
Here you can determine if a report needs to be run once or scheduled. Run Report Now will be selected as a default. Although the output will be sent to the output folder selected above, you can also put in an email address if you would like the output to be sent to your email, too.
Check off Recurring Report? if you want to schedule the report. You will then be presented with a few options for how often the report can run. It’s common to choose 1 months for a monthly report.
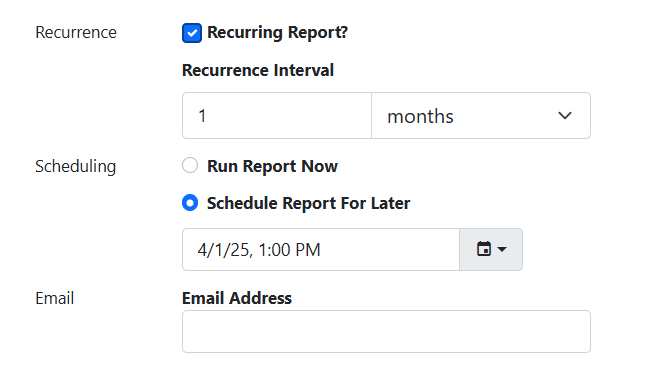
Next, choose Schedule Report for Later if you want to start the monthly report at the first of the month. A calendar picker will appear and you can select the correct date.
Again, you can fill in your email address if you want the results emailed to you.
Finally, click Save and schedule report.
Errors

If you receive an error before being able to save and schedule the report, make sure to go back into the Filters tab and make corrections.
Pivot Label Column and Pivot Data Column
These fields are only useful in certain situations, where you would want data to appear as a column rather than as a row in the report. If this section is recommended for a specific template, that will be indicated in the instructions for running a report for that template. Otherwise, this section can be ignored.