Evergreen Printing Setup
Overview
There are two options for printing when working in Evergreen:
-
Printing without Hatch: Uses your browser’s built-in print functionality with some configuration
-
Printing with Hatch: Uses a browser extension that enables printer selection within Evergreen
Hatch allows you to choose different printers for different functions (receipts, pull lists, reports, etc.) directly within Evergreen. Without Hatch, you will use the browser’s printer settings and will not be able to use the printer settings in Evergreen.
Printing Without Hatch
If you have simple printing needs, you can use your browser’s built-in printing functionality. See the browser-specific setup pages for detailed instructions:
| Key points about printing in Evergreen without Hatch: |
-
The print dialog box will appear for each print job, requiring you to click OK each time
-
If you use multiple printers, you need to select the correct printer for each print job
-
Choosing "Print" from the browser’s menu will print the entire page, not just a receipt
-
When possible, use the "Print" option within Evergreen’s interface instead of the browser print function
Printing with Hatch
Hatch provides more control over printing in Evergreen, allowing you to configure different printers for different types of print jobs.
Installing Hatch
-
Download and install the Hatch software on your PC:
-
Install the "Hatch Native Messenger" browser extension:
For browser-specific installation steps, see:
-
Log into the Evergreen Web-Based Staff Client and verify that Hatch is connected. When Hatch is properly connected, you will see two green arrows in the browser menu in the top right corner.
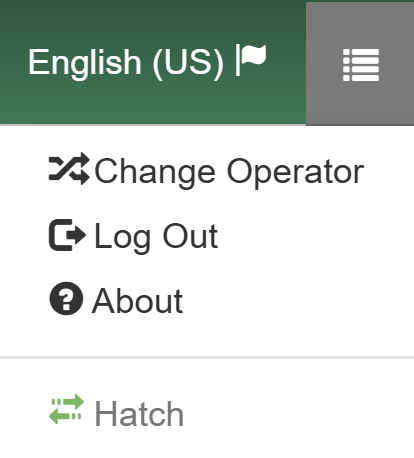 Figure 1. Hatch Connected Indicator in Evergreen ILS
Configuring Hatch in Evergreen
-
Navigate to Administration > Workstation > Hatch (Print Service) Printer Settings.
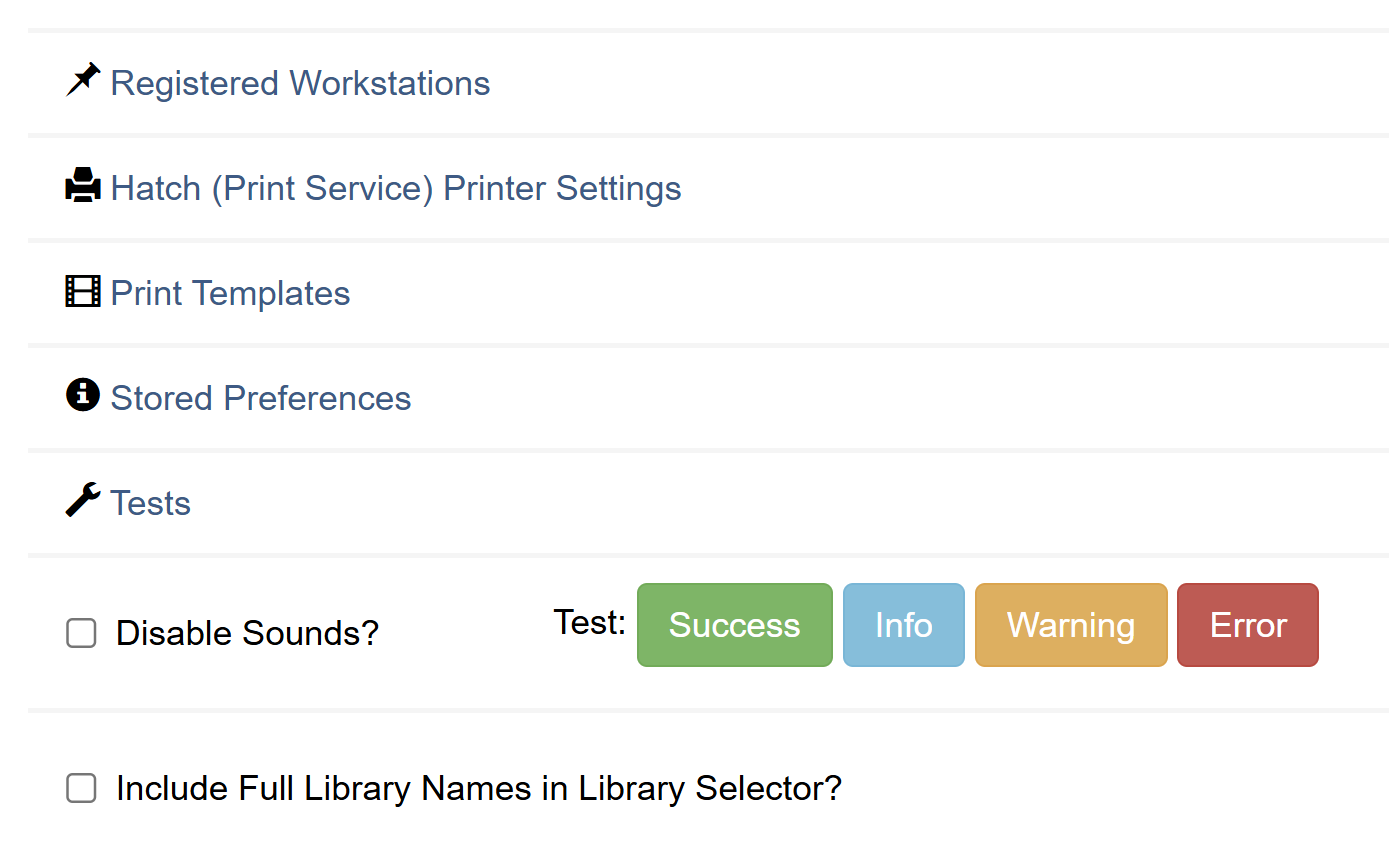 Figure 2. Print/Storage Service Menu Option
 -
Select Use Hatch for Printing.
Do NOT select the other two options: "Store Local Settings in Hatch" or "Store Offline Transaction Data in Hatch".  Figure 3. Hatch Configuration Settings
Your selections will be saved automatically. -
For each printer context:
-
Select the correct printer from the dropdown menu
 Figure 4. Printer Selection in Hatch Settings
 -
Change Paper Type to an appropriate size (e.g., Roll Paper 80 x 297 mm for receipt printers)
-
Set Automatic Margins to "HARDWARE MINIMUM"
-
Click Apply Changes to save your settings
If you don’t see the receipt paper option, you may need to select the receipt printer from the dropdown menu again.
-
Configuring Print Templates
-
Navigate to Administration > Workstation > Print Templates.
-
For each template you want to configure:
-
Select the template from the dropdown menu
-
Select the appropriate printer in the Force Printer Context dropdown
-
Click Save Locally
 Figure 5. Print Templates Configuration
Common templates that benefit from automatic printing configuration include Checkout Slip, Hold Shelf Slip, and Transit Slip.
-
Troubleshooting
White Screen in Evergreen / Nothing Loads
If Evergreen displays a white screen or fails to load, there is a known issue where this commonly happens when the Hatch browser extension is installed but the Hatch Windows application is not. Follow these steps:
-
Verify both components of Hatch are properly installed:
-
Check if the Hatch browser extension is installed by looking for the extension icon in your browser
-
Verify the Hatch Windows application is installed by checking if it appears in "Programs and Features" in Windows
-
-
If only the browser extension is installed but the Windows app is not:
-
Install the Hatch Windows application from:
https://evergreen-ils.org/downloads/Hatch-Installer-0.3.3.exe
-
-
If both are installed but you’re still experiencing issues:
-
Clear the cache in your browser
-
Restart both your browser and the Hatch application
-
-
If problems persist, try a complete reinstallation:
-
Uninstall the Hatch browser extension
-
Uninstall the Hatch Windows program:
-
Search for "Programs and Features" in the Windows Start menu
-
Select "Evergreen-ILS Hatch…" then "Uninstall"
-
-
Delete the Hatch folder from your computer (if it exists):
-
Open File Explorer
-
Navigate to
C:\Program Files (x86) -
Delete the "Hatch" folder
-
-
Reinstall both the Hatch Windows application and browser extension following the installation instructions above
-
Changing Printer Selection for Templates
If you need to change which printer is used for a specific template:
-
Navigate to Administration > Workstation > Print Templates.
-
Select the template from the dropdown menu.
-
To change the automatic printer selection:
-
Select a different printer from the Force Printer Context dropdown
-
Click Save Locally
-
-
To use a print dialog instead of automatic printing:
-
If you have a customized template you want to keep:
-
Copy the entire content of the template editor
-
Paste it into a text editor like Notepad or Word
-
-
Click Reset to Default
-
If you had customizations, paste your saved template content back
-
Click Save Locally
Resetting to default will remove the Force Printer Context setting, causing print jobs to display the print dialog, but it will also reset the template itself to default values.
-