Managing Holds
Holds can be managed at any time by staff or patrons. Before holds are captured, staff can suspend them or set them as inactive for a period of time without losing the hold queue position, activate suspended holds, change notification method, phone number, and pick-up location. Once the hold is captured, staff can change the pick-up location if required.
| Staff can edit holds in either patron’s records or the title records. Patrons can edit their holds in their account on the OPAC. |
Actions for Selected Holds
-
Retrieve the patron record and go to the Holds screen.
-
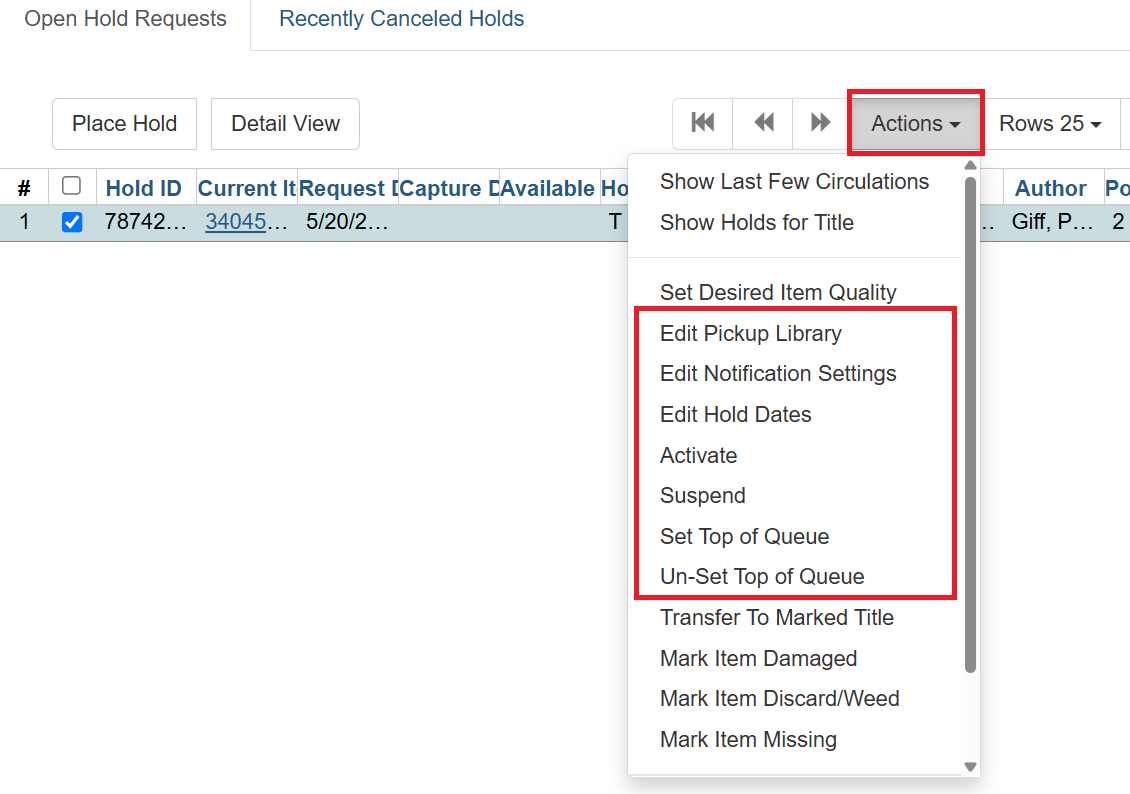
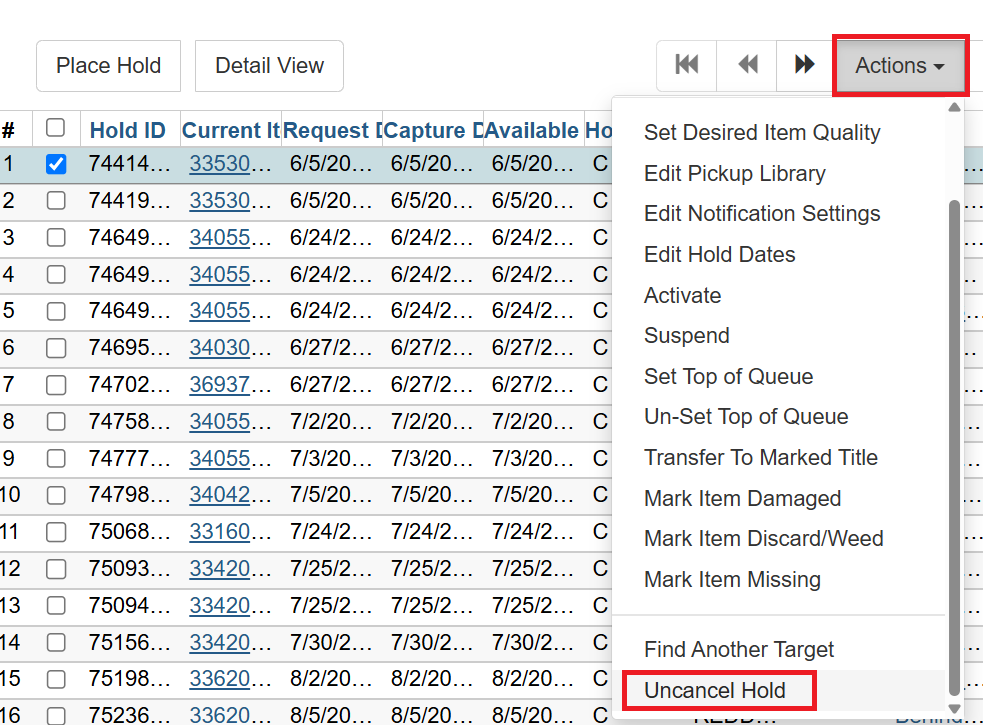
Highlight the hold record, then select Actions.
-
Manage the hold by choosing an action on the list. If you do not see what you want, be sure to scroll to the end of the list.
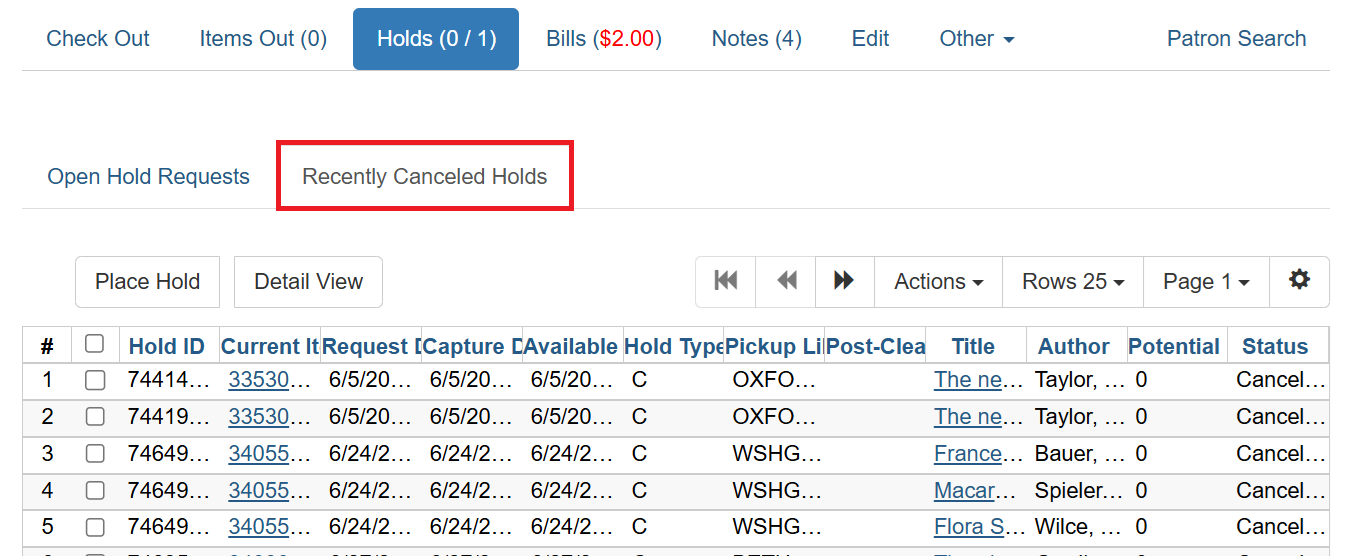
If you want to cancel the hold, click Cancel Hold from the menu. You are prompted to select a reason and put in a note if required. To finish, click Cancel Hold.
| A captured hold with a status of On Hold Shelf can be canceled by either staff or patrons. But the status of the item will not change until staff check it in. |
If you want to suspend a hold or activate a suspended hold, click the appropriate action on the list. You will be prompted to confirm your action.
|
A suspended hold will not be filled for as long as it is suspended. However, its position in the hold queue will remain in place. It will automatically become active on the activation date, if one has been set up on the record. Without a set activation date, the suspended hold will remain inactive until staff or patron manually activates the hold. To both suspend a hold and set an activation date in one step, choose Edit Activation Date from the Actions menu. This will suspend the hold and schedule it to reactivate on the date you specify. |
| Patrons can also suspend and activate their own holds through the OPAC. See Suspending/Activating Holds in the OPAC for details. |
You may edit the Activation Date and Expiration Date by using Edit Hold Dates on the Action dropdown menu. You will be prompted to enter the new date. Use the calendar widget to choose a date, then click Submit. Use the Clear button to unset the date(s). You will need to check the box next to the date you want to change.

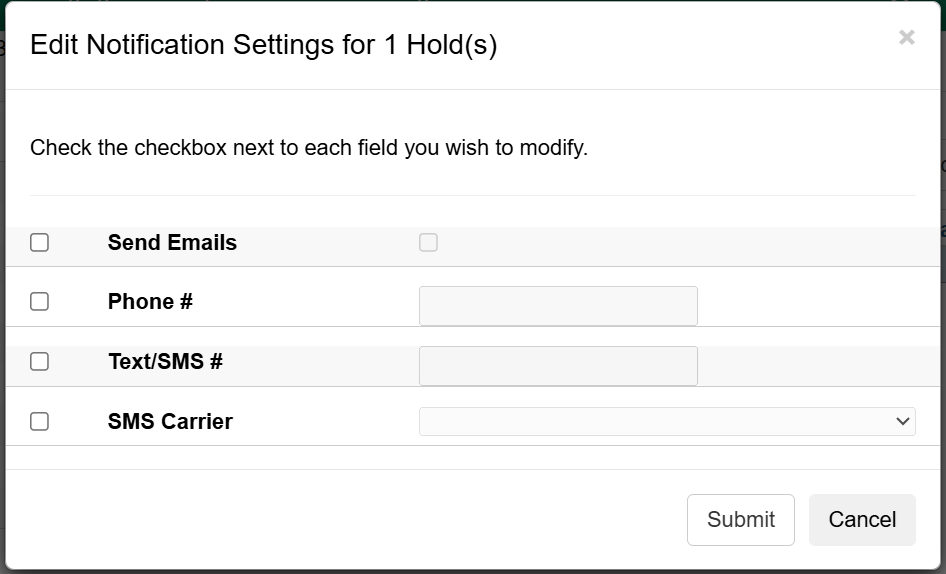
If you want to enable or disable phone notification, or change the phone number, click Edit Notification Settings. You will be prompted to enter the new phone number. Make sure you enter a valid and complete phone number. The phone number is used for this hold only and can be different from the one in the patron’s record. It has no impact on the patron record. If you leave it blank, no phone number will be printed on the hold slip. If you want to enable or disable email notifications for the hold, check Send Emails on the prompt screen. You will need to check the box next to the setting you want to change.
Pick up location can be changed by clicking Edit Pickup Library. Click the dropdown list of all libraries and choose the new pickup location. Click Submit.
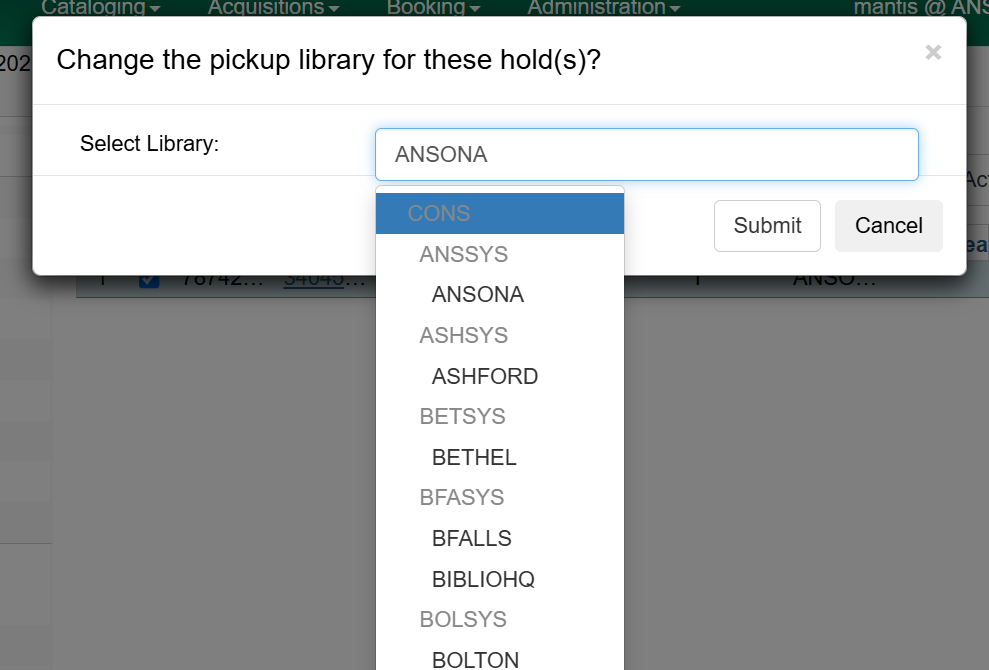
| Staff can change the pickup location for holds with an In-Transit status. When it is scanned in at the original destination, the item will be sent in-transit to the new destination. Staff cannot change the pickup location once an item is on the holds shelf. |
Viewing Details & Adding Notes to Holds
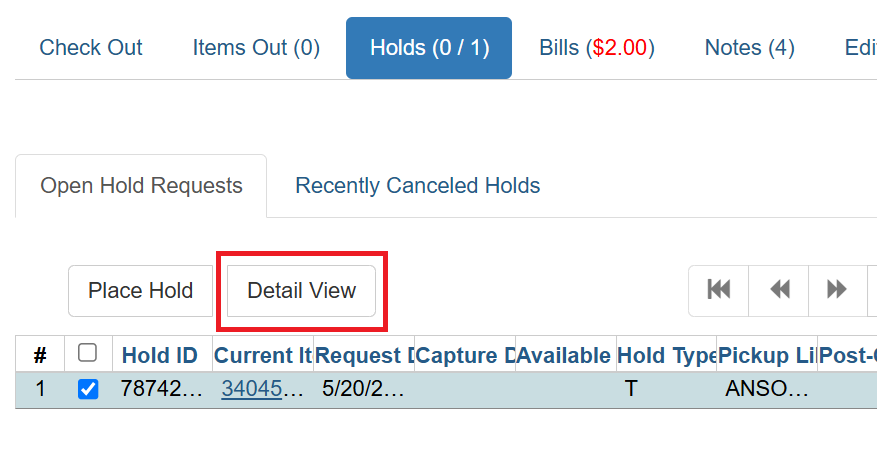
You can view details of a hold by selecting a hold then clicking the Detail View button on the Holds screen.
Add a note to a hold in the Detail View, by clicking New Note. You will need to scroll down to find it.
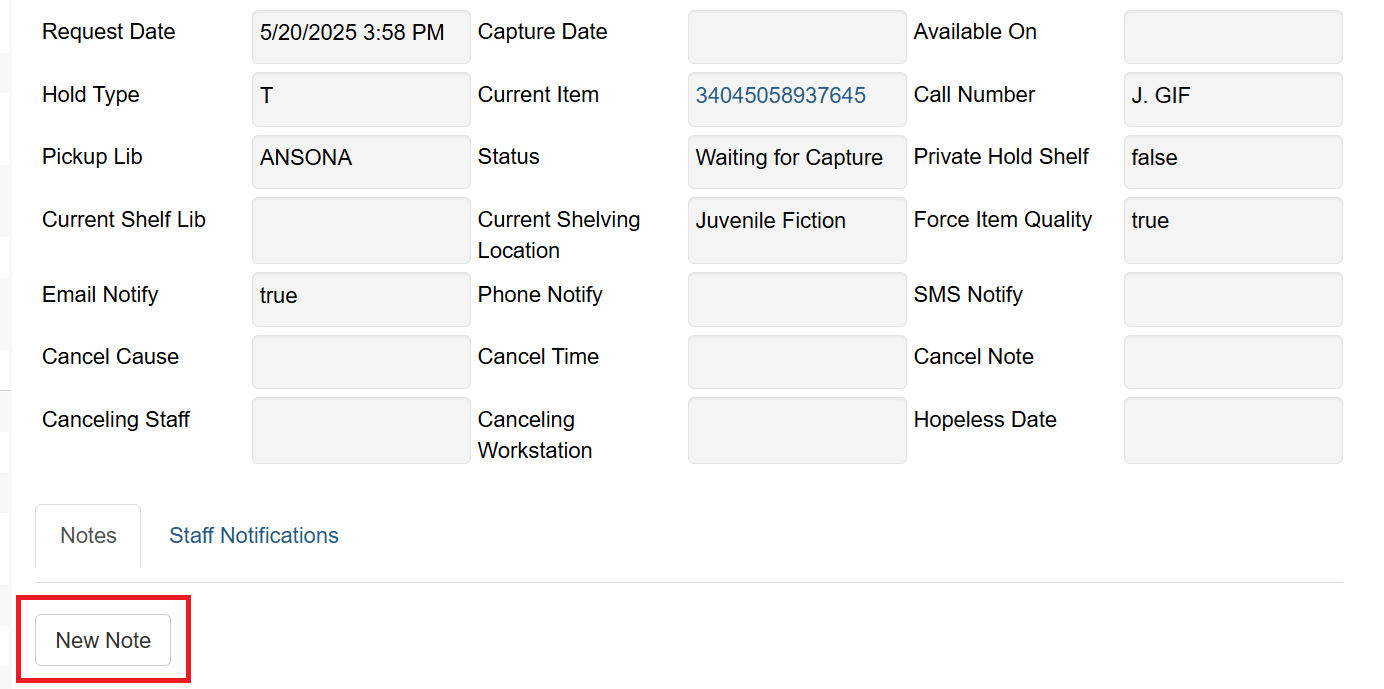
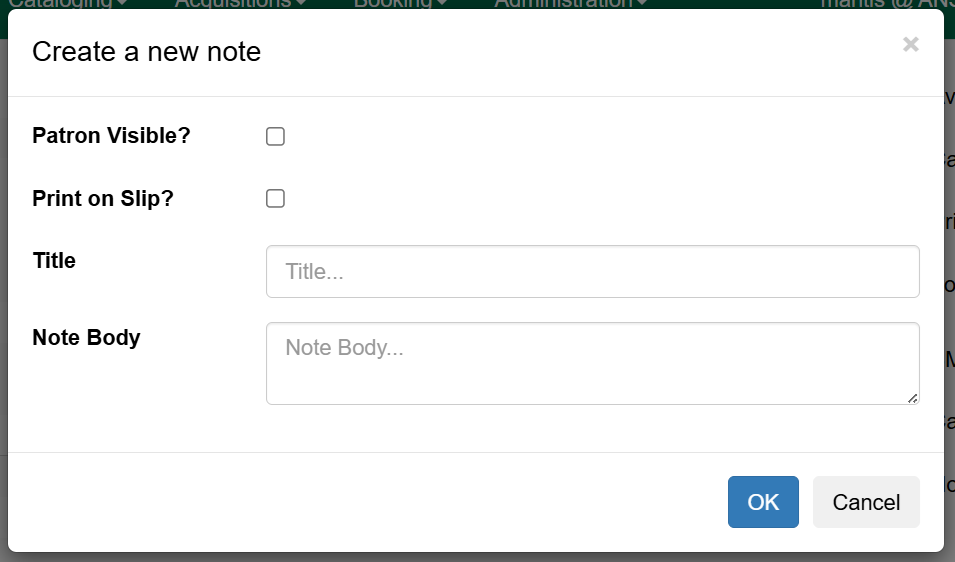
Notes can be printed on the hold slip if the Print on slip? checkbox is selected. They can also be made visible in the patron OPAC if Patron Visible? checkbox is selected.
Enter the message, then click OK.
Displaying a Patron’s Queue Position
Using the Column Picker, you can display Queue Position and Potential Copies in the consortium.

Managing Holds on Title Records
-
Retrieve and display the title record in the catalog.
-
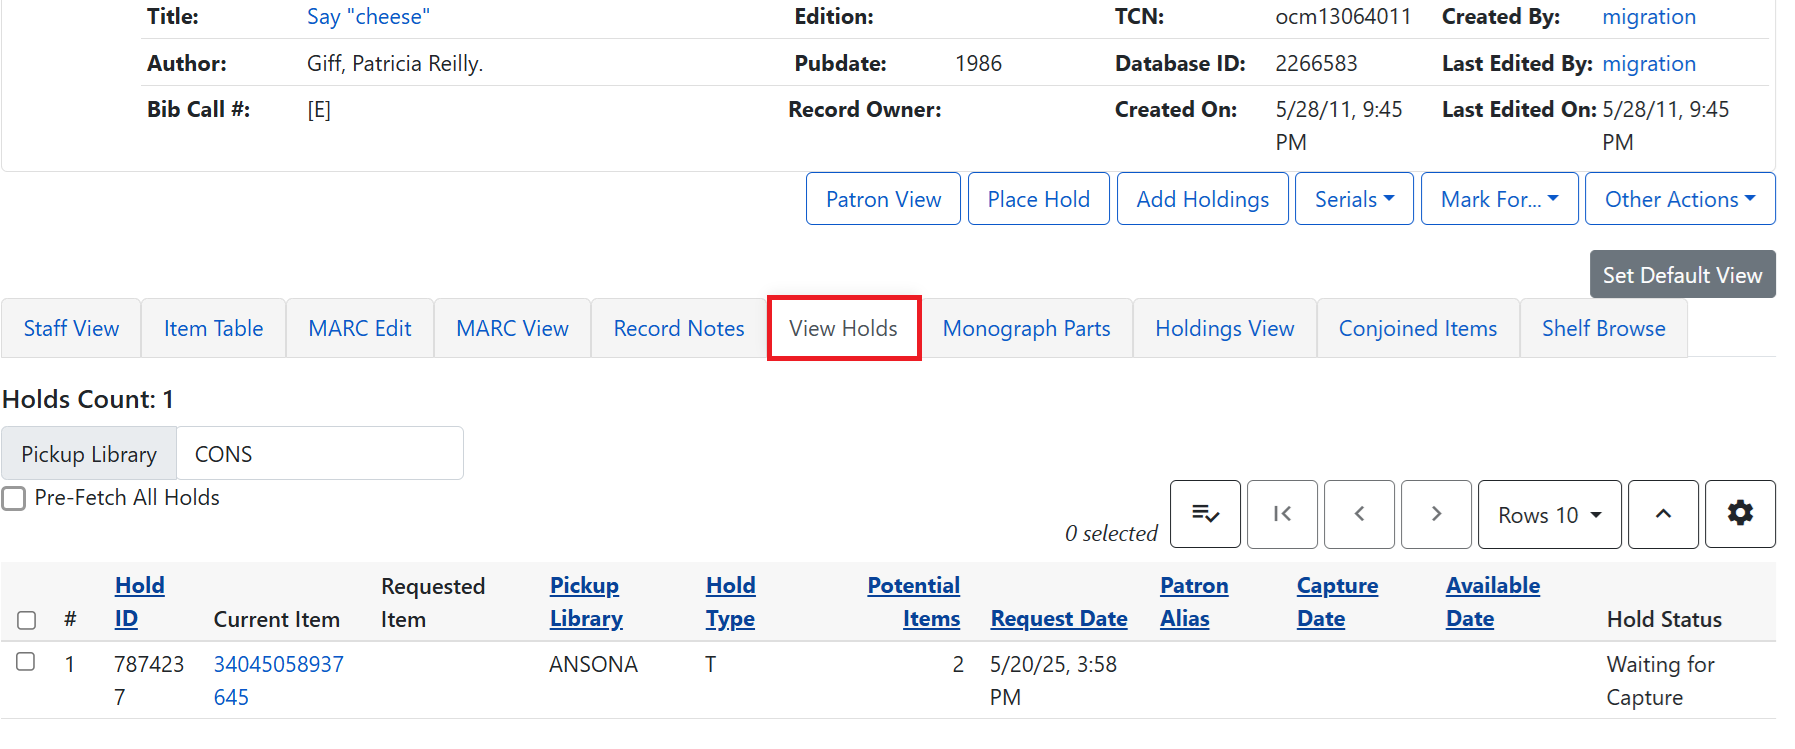
Click the View Holds tab.
-
The screen will display a list of all holds on this title, to be picked up at your library.
-
Highlight the hold you want to edit (click the row, or click the checkbox). Choose an Action.
Retargeting Holds
Holds can be retargeted whenever a new item is added to a record, or after some types of item status changes, e.g. when an item is changed from On Order to In Process. The system does not automatically recognize the newly-added items as available to fill holds.
-
View the holds for the item.
-
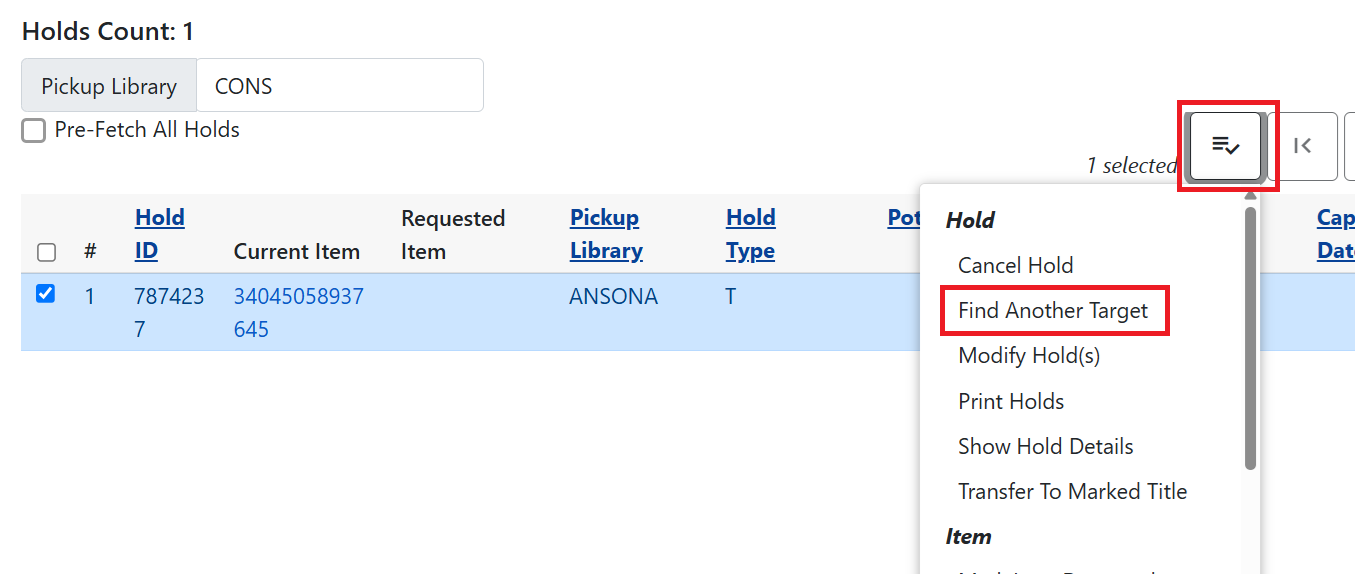
Select the hold you wish to retarget.
-
Click on the head of the Status column.
-
Under Actions, select Find Another Target.
-
A window will open, asking if you are sure you would like to retarget the holds for these items.
-
Click Retarget. Nothing will appear to happen.
-
However, when the screen refreshes, the holds will be retargeted. The system will now recognize the new items as available for holds.
|
When to use each retargeting method:
For more details on checkin modifiers, see Check In. |
Pulling and Capturing Holds
Holds Pull List
There are usually four statuses a hold may have: Waiting for Copy, Waiting for Capture, In Transit, and Ready for Pickup.
-
Waiting for Copy: all holdable copies are checked out or not available.
-
Waiting for Capture: an available copy is assigned to the hold. The item shows up on the Holds Pull List waiting for staff to search the shelf and capture the hold.
-
In Transit: hold is captured at a non-pickup location, and on the way to the pick-up location.
-
Ready for pick-up: Holds are captured and items are on the Hold Shelf waiting for patrons to pick up. Besides capturing holds when checking in items, Evergreen matches holds with available items in your library at regular intervals. Once a matching copy is found, the item’s barcode number is assigned to the hold and the item is put on the Holds Pull List. Staff can print the Holds Pull List and search for the items on shelves.
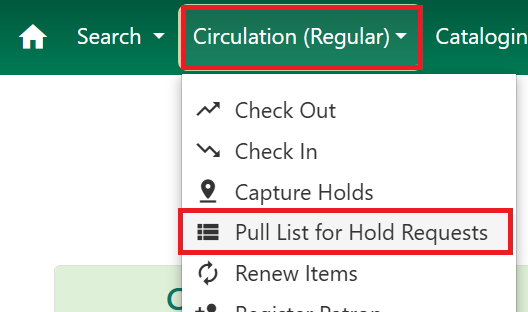
To retrieve your Holds Pull List, select Circulation → Pull List for Hold Requests.
The Holds List is displayed. 10 rows are shown by default, but You may re-sort them by clicking on the column labels, e.g. Call Number. You can also add fields to the display by using the column picker.
Print Full List prints the following fields: Title, Author, Shelving Location, Call Number and Item Barcode. You can also choose Print Full Grid from the column picker menu to print the columns as they display on the screen.
You can perform holds management tasks by using the Actions dropdown list.
The Holds Pull List is updated constantly. Once an item on the list is no longer available, or a hold on the list is captured, such items will disappear from the list. The Holds Pull List should be printed at least once a day.
Capturing Holds
Holds can be captured when a checked-out item is returned (checked in) or an item on the Holds Pull List is retrieved and captured. When a hold is captured, the hold slip will be printed and if the patron has chosen to be notified by email, the email notification will be sent out about thirty minutes later. The item should be put on the hold shelf.
-
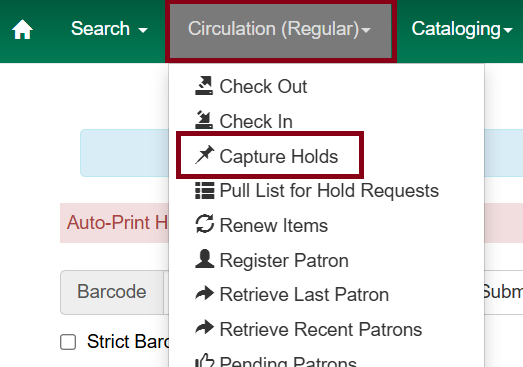
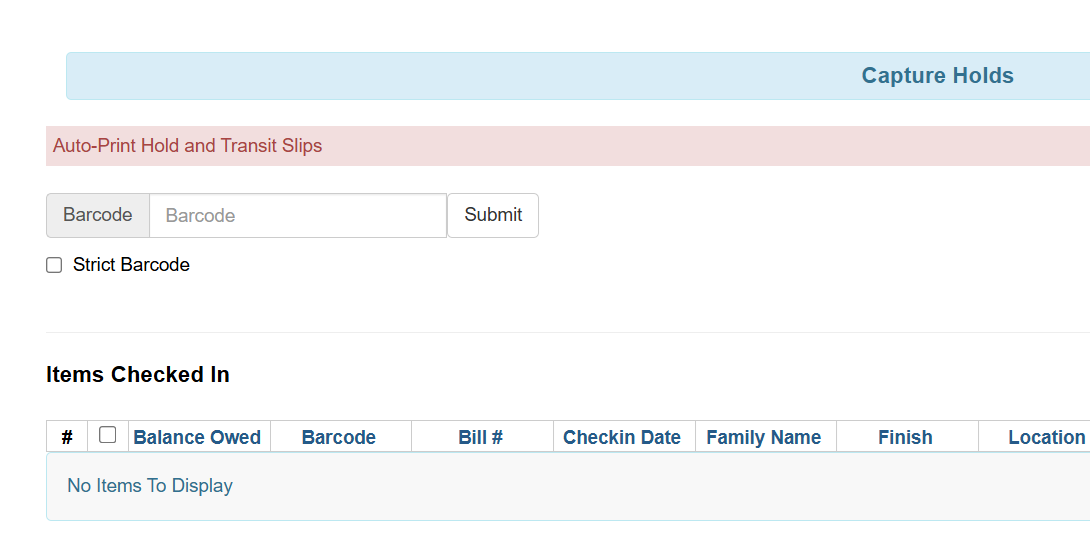
To capture a hold, select Circulation → Capture Holds (or keyboard shortcut Shift-F2)
-
Scan barcode or type barcode and click Submit.
-
The hold slip will print automatically. If your workstation is not set up for ‘silent’ printing, then a print window will appear.
-
If the item should be sent to another location, a hold transit slip will be printed.
| If a patron has an OPAC/staff Client Holds Alias in their account, it will be used on the hold slip instead of the patron’s name. Holds can also be captured on the Circulation → Check In Items screen where you have more control over automatic slip printing. |
Handling Missing & Damaged Items, or Items to be Discarded/Weeded
If an item on the holds pull list is missing, damaged, or should be discarded/weeded, you can change its status directly from the hold pull list.
-
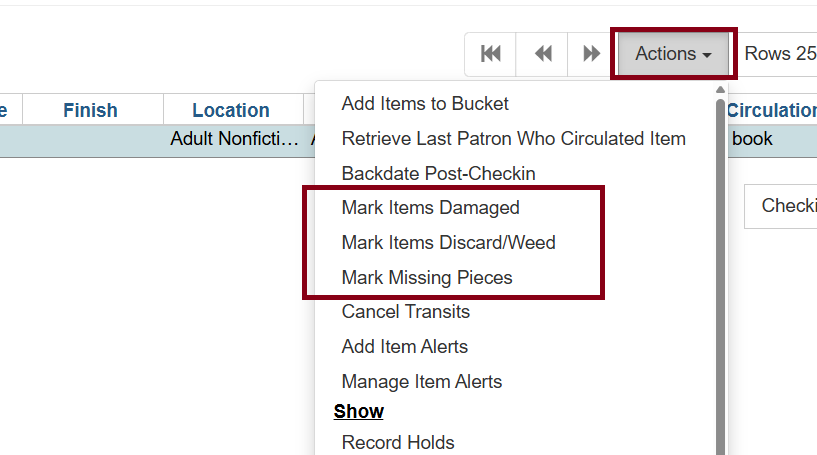
From the Holds Pull List, right-click on the item, or highlight it and click Actions. Select Mark Item Damaged, Mark Item Discard/Weed, or Mark as Missing Pieces,.
-
Evergreen will update the status of the item and will immediately retarget the hold.
Transfer Hold to Another Bibliographic Record
Holds on one title can be transferred to another, with the hold request time preserved. This is helpful when library staff realize that a hold has been placed on a record with fewer items than another, or if the patron wanted the same title but in a different format instead of their initial request. You may transfer the hold, and the hold will be placed into the queue by the initial request date.
Transfer Holds
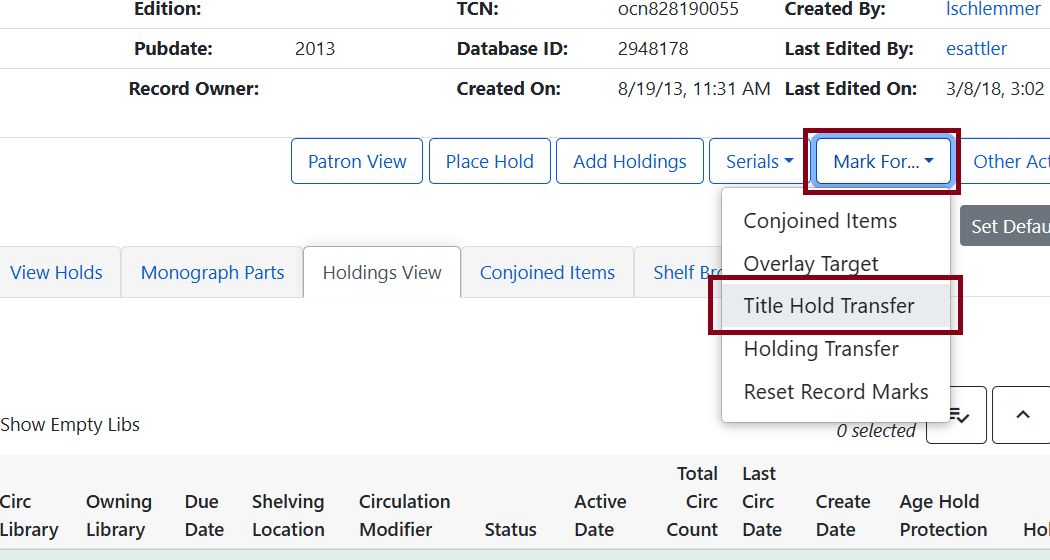
In the staff catalog, find the record for the new destination title. click Mark For → Title Hold Transfer.
From patron record:
-
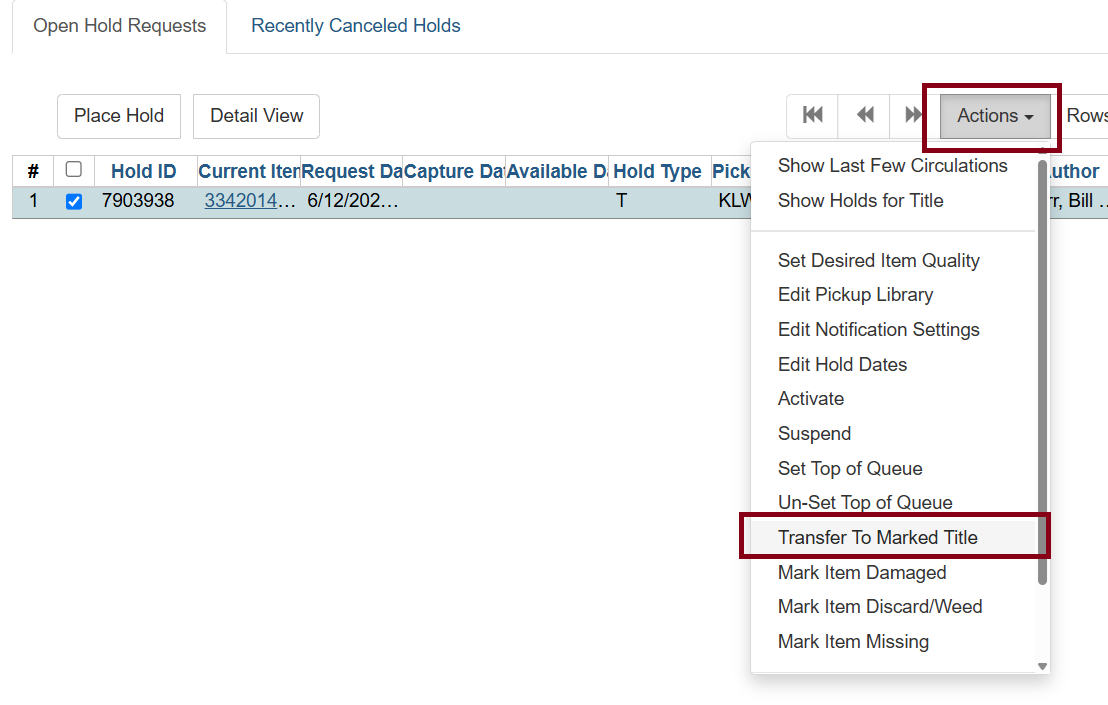
Select the hold you want to transfer from the Item Record. Select Actions, then Transfer to Marked Title.
-
Follow the prompts, click OK/Continue, and the hold will be trasnferred to the new record.
Hopeless Holds
A hold becomes “hopeless” when all eligible copies become unavailable.
For example, Joy places a hold on a title record that only has one available copy. When staff go to pull that copy to fill the hold, they cannot find it and mark it Missing.
Normally, if there were other copies still available, the holds targeter would retarget the hold to another copy. However, since there are no other copies that can be targeted, the hold gets added to the Hopeless Holds list.
Library staff can check the Hopeless Holds list to see if there is another title record that the hold can be transferred to in order to fill the hold for the patron. Libraries may also use this list for collection development purposes.
For more information on the Hopeless Holds functionality, see Local Administration: Hopeless Holds.
Hold Reset Reasons
Hold reset reasons allow staff to see when and why a hold request has been reset. Reset reasons are generated any time a hold has been reset, whether that’s a manual reset from a staff member (i.e.: Retarget Hold, Find Another Target) or automatically because a hold has reached the hold retarget interval.
To locate the hold reset entry:
-
Open a patron account and go to their Holds tab.
-
Select a hold and click Detail View.
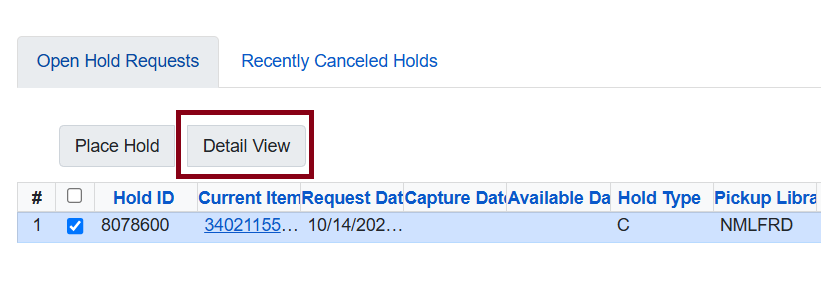 Figure 19. Detail View button
 -
Scroll down and click on Reset Entries.
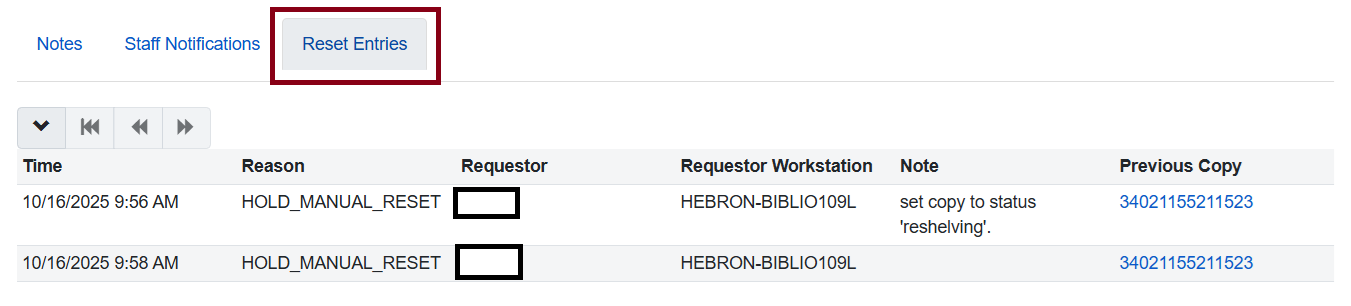 Figure 20. Reset Entries tab
Troubleshooting
| Problem | Solution |
|---|---|
No patron contact information on the hold slip, and the patron was not notified |
This can happen for several reasons: (1) The hold was placed through the Kid’s Catalog, which has a bug that prevents notification options from carrying over. (2) All hold notification options were accidentally unchecked when the hold was placed. (3) The patron’s user settings have all notification options unchecked, which means they will be unchecked by default on every new hold. If there is no contact information on the slip, the patron will not be notified unless staff call them. To fix this after capture, select the hold and use Actions → Edit Notification Settings to set phone, email, or SMS/text preferences. Notifications will still generate even after a hold has already been captured. |
I forgot to choose the Retarget Local Holds checkin modifier when processing a new item. |
Choose Retarget Local Holds and Retarget All Statuses before checking in the item again. |