Carousel Management
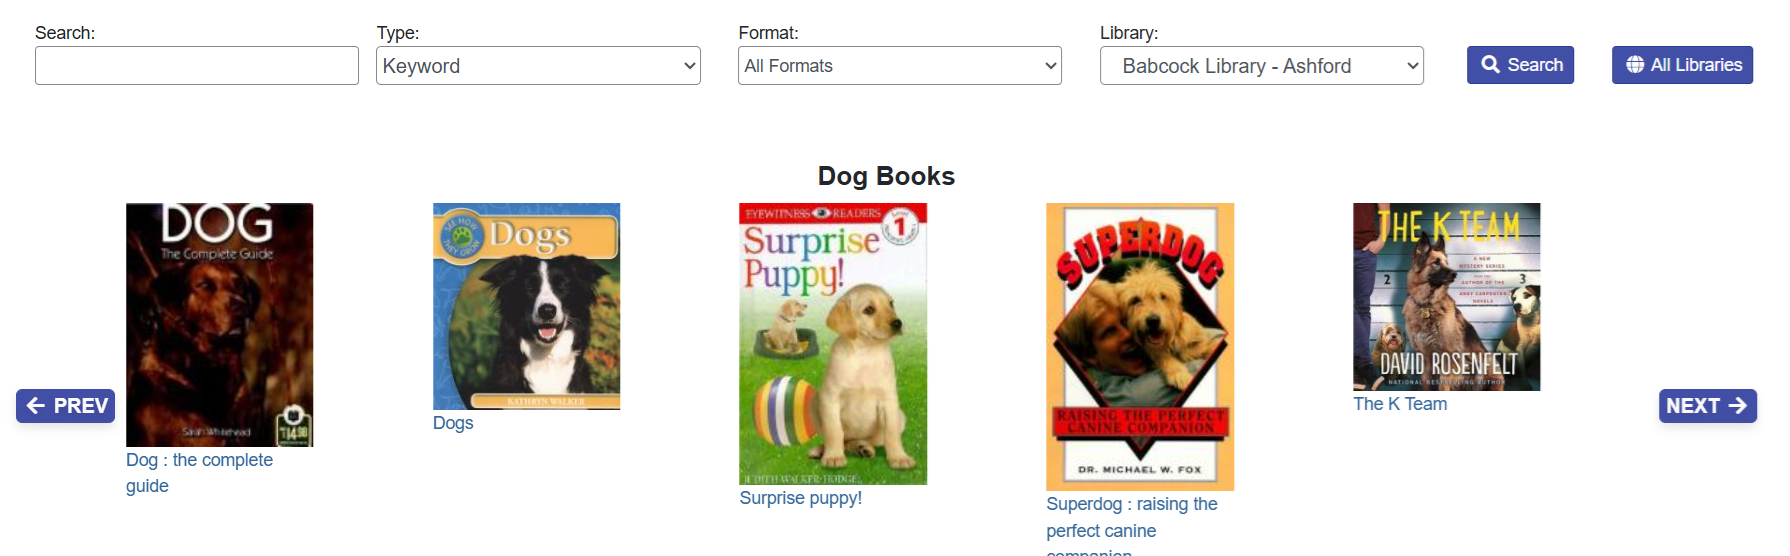
These are displays of records that show up in the catalog home page. If you click on the image of or link of the item, it will bring you to the record.
Every library’s OPAC already has one carousel which is automatically maintained for new items, but you are able to make custom carousels from record buckets.
Custom Carousels from Record Buckets
Adding Items to a Record Bucket
-
Search for your materials in the staff or patron view catalog.
-
Add items into a basket.
-
When done, click Add Basket to Bucket.
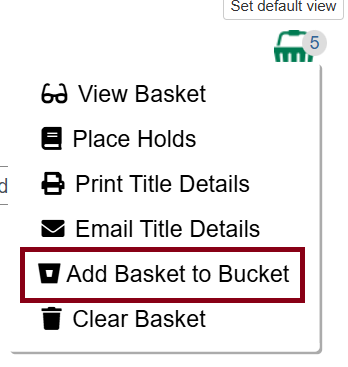

You can add to an existing bucket or to a new bucket in case you didn’t create a new bucket yet.
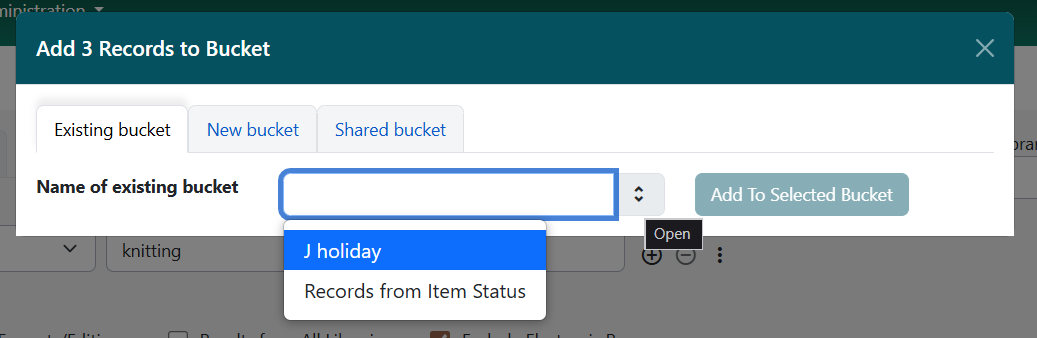
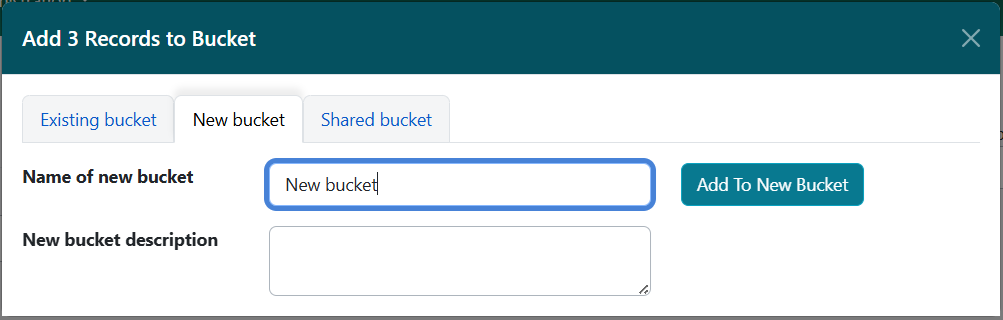
Optionally, you can add to a shared bucket, but this is only recommended if you and another staff member are collaborating on carousels.
| It’s recommended that all bib records have an included picture of the cover. If you add a record without a cover image, the carousel won’t populate a picture and will just have the title available. |
| The carousel doesn’t have a minimum but the rotation feature does need at least four to do a full rotation without any duplicates. |
Create a New Carousel
-
Go to Cataloging → Record Buckets.
-
Select the record bucket from the list in Bucket View.
-
Review the items you placed in this bucket.
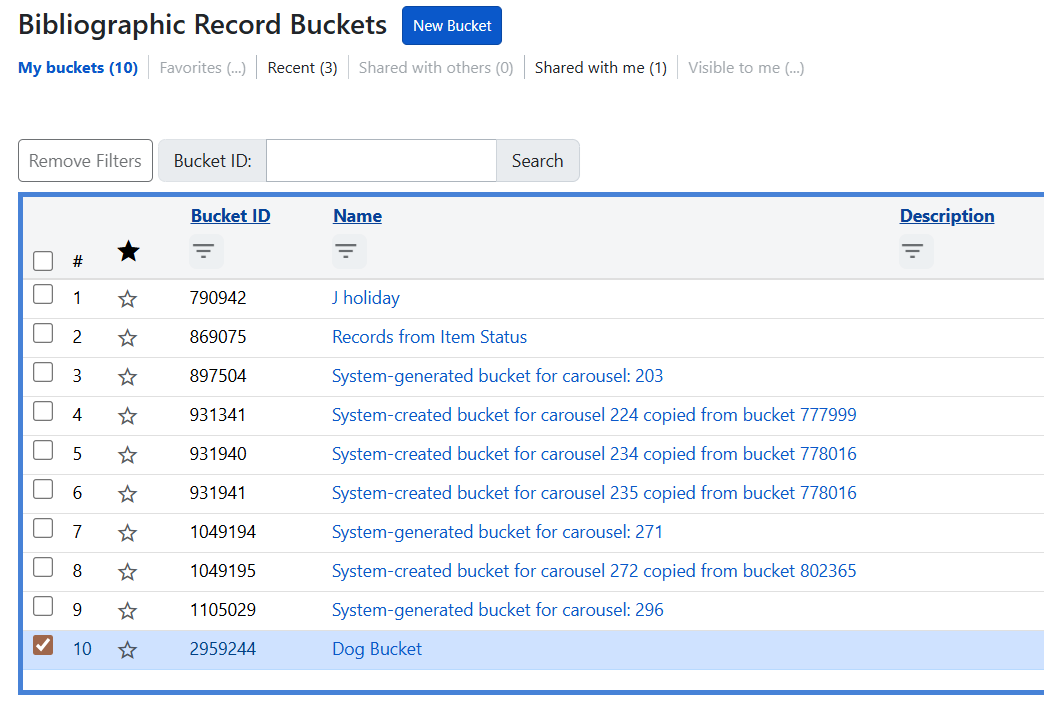 Figure 6. Select record bucket
 Figure 7. Viewing record bucket
 -
If it looks good, click Return to Buckets, check off the bucket, go to Actions, and select Create Carousel from Bucket.
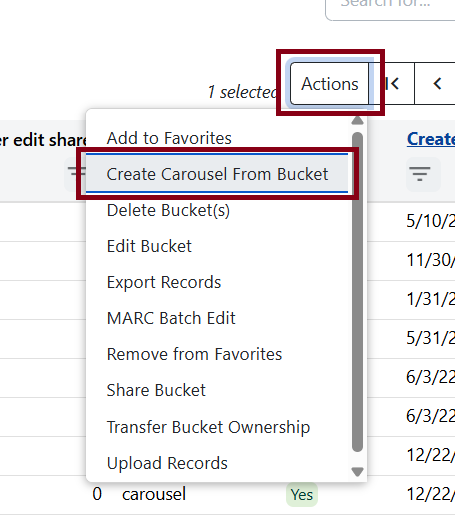 Figure 8. Create carousel option from bucket
 -
Choose a name for your carousel.
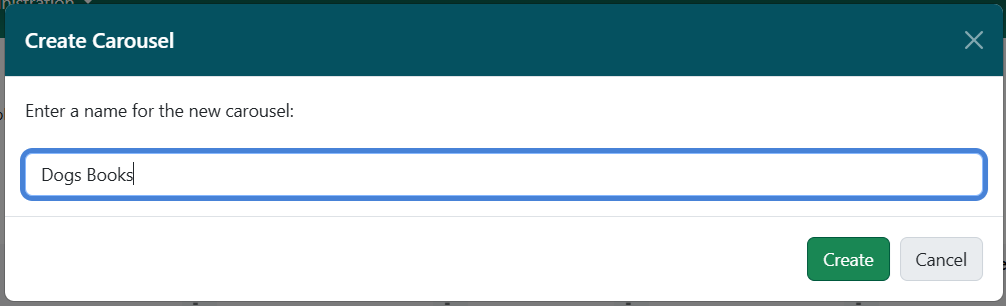
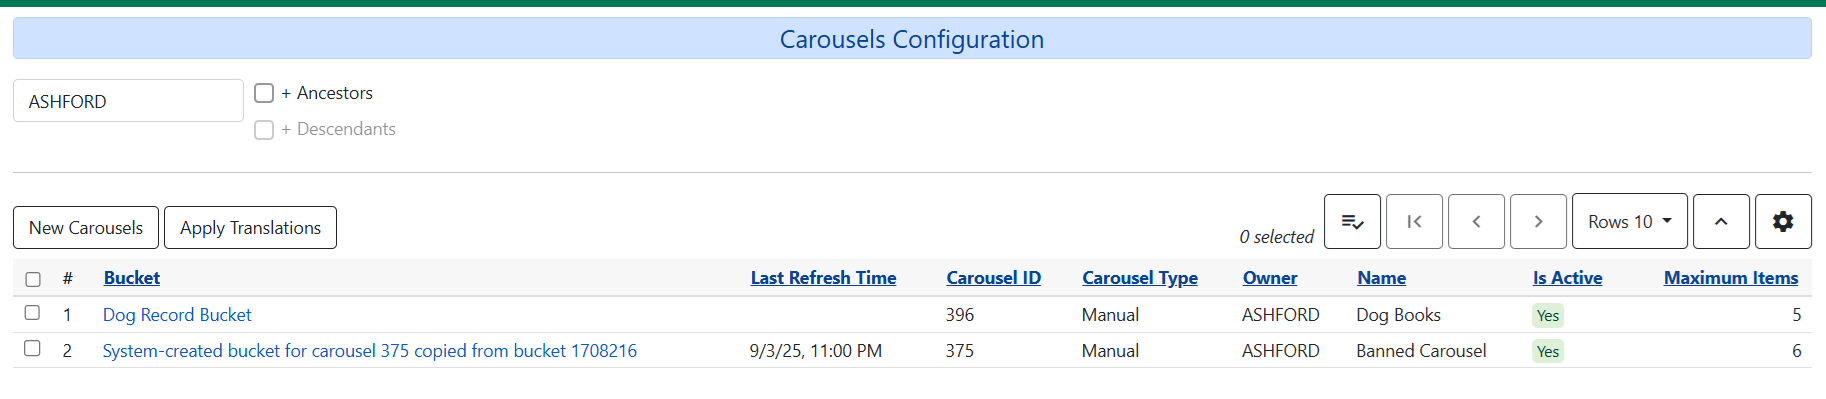
After creating the carousel, you’ll be brought to a Carousels Configuration screen. Make sure the correct library branch is selected if you work in a library system. You’ll see all the active carousels for your library.
Create a New Carousel Map
-
Go to Administration > Local Administration > Carousel Library Mappings.
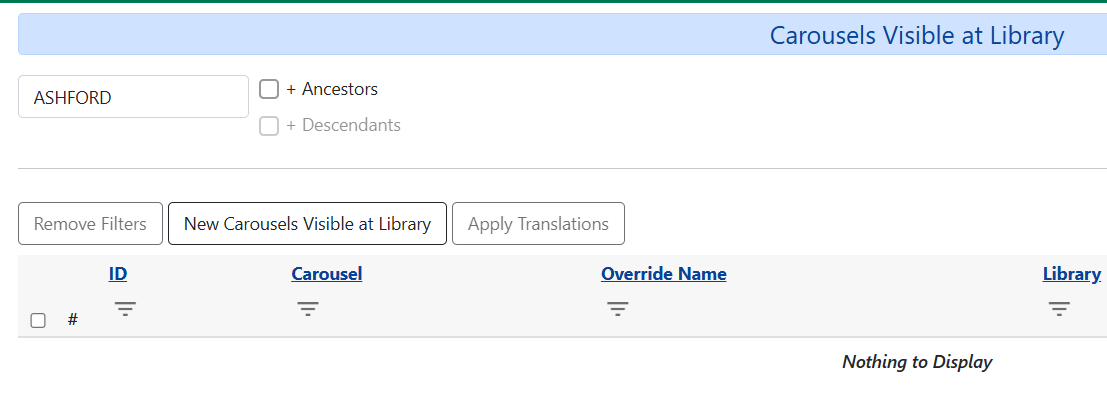 Figure 11. Carousel Mappings screen
 -
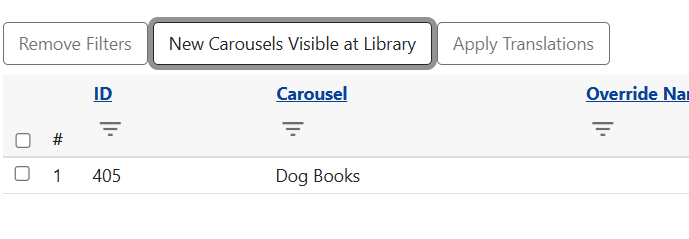
Click on New Carousels Visible at Library.
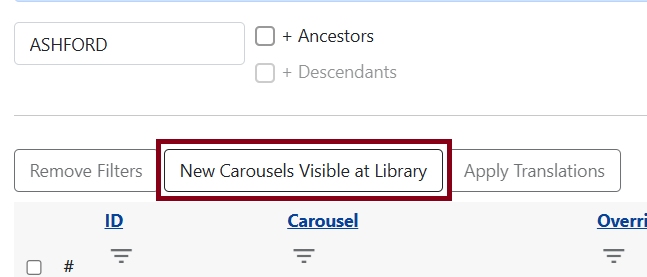 Figure 12. New carousels visible at library button
 -
Fill out the form with the appropriate carousel and library. For sequence number put in whichever number you want the carousel to appear in order with 0 being first, 1 being second, 2 being third, etc. You can always go back and edit the sequences if needed.
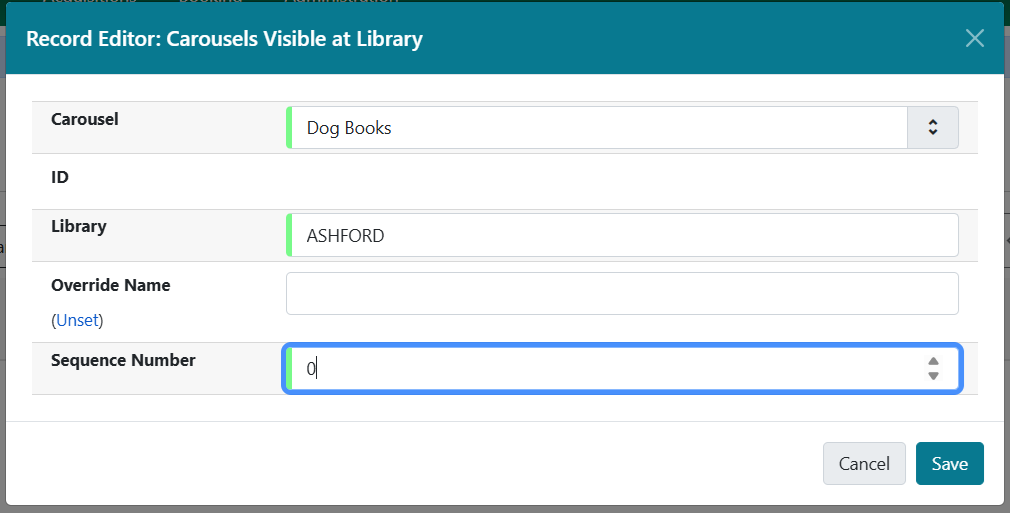 Figure 13. Carousel visible at library form
 -
Once this is saved, the carousel map will appear in the list.
Automated Carousels
Carousel Configuration also has four other types of carousels that are automated so you don’t need to build a manual record bucket. These are handy options if you want to refresh your OPAC homepage with material on the fly.
-
To explore these options, go to Administration → Local Administration → Carousels.
-
Click on New Carousels.
-
Your automated carousels will be under Carousel Type.
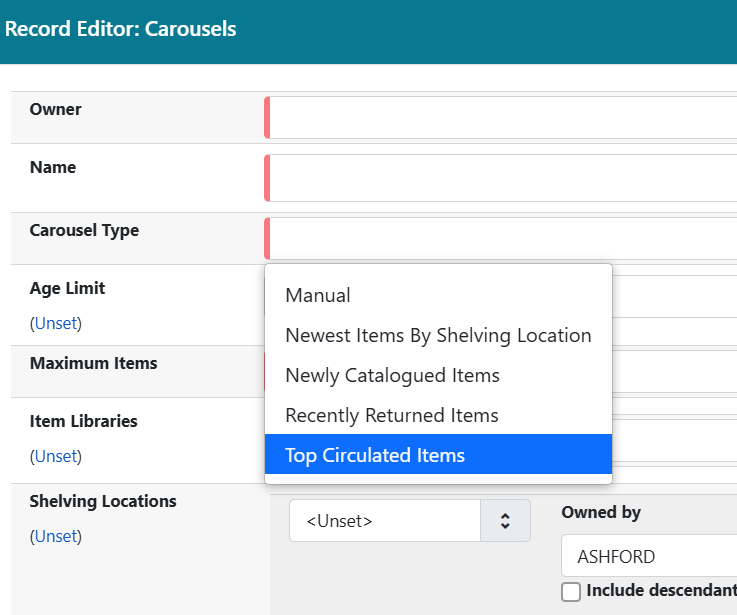 Figure 16. Carousel type
 -
Select your option and fill out the rest of the form.
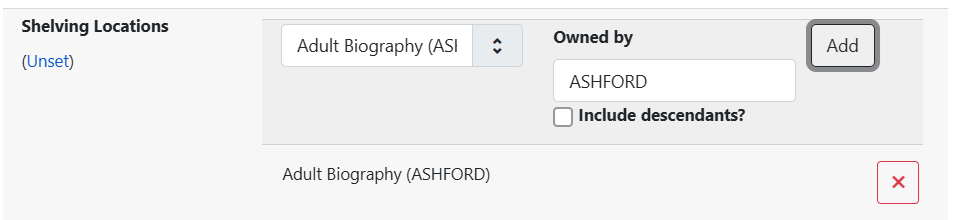
| Do not select Include descendants? under Owned By. |
Carousel Filters
Shelving Location Filter
If you want to filter further, consider selecting specific Shelving Locations from the dropdown menu. Click Add to put in the list. Click X next to the selections you want to delete.
Age Limit Filter
Age Limit allows items to remain in the carousel for a certain amount of time depending on what the carousel type is.
Note that depending on your maximum item limit, the carousel may kick out other items that may be within the age limit.
| While you can use different variations of time, we recommend using months. To properly add that, please type the number of months followed by “mon”. “Mon” is the proper syntax for the Evergreen carousels or else the carousel won’t save. |
Carousel Maintenance
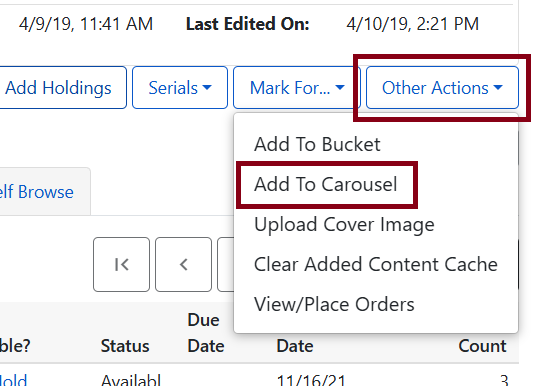
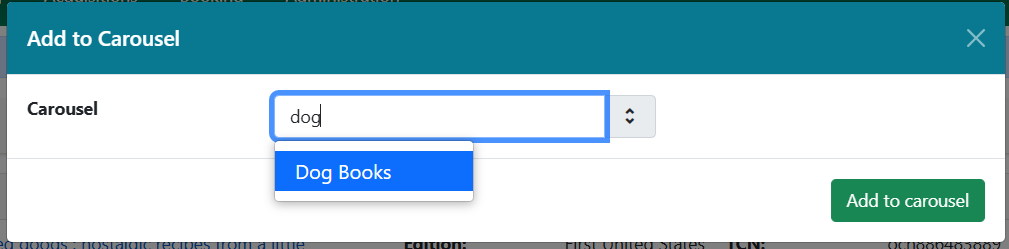
Adding Items to Carousel
When viewing a record summary in the staff catalog, go under Other Actions → Add to Carousel then select from the dropdown.
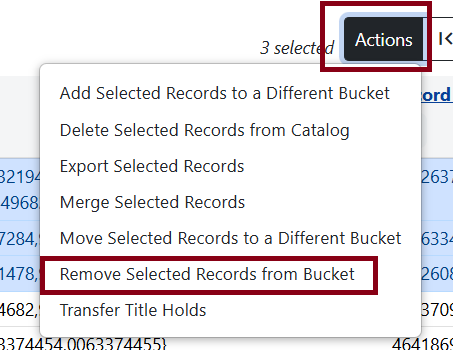
Removing Items from Carousel
Go to Local Admin → Carousels. Select the appropriate carousel and click Link to Bucket.
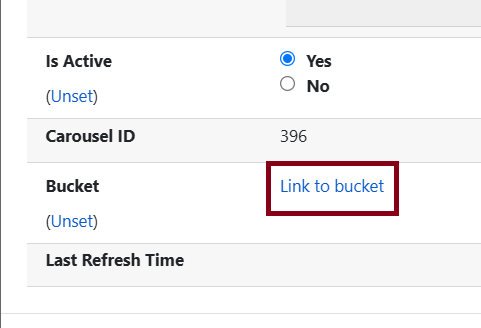
This will bring you to the record bucket used for the carousel. Here you can select titles you wish to remove. The carousel will automatically refresh after changes are saved. Refresh your OPAC to see reflected changes.
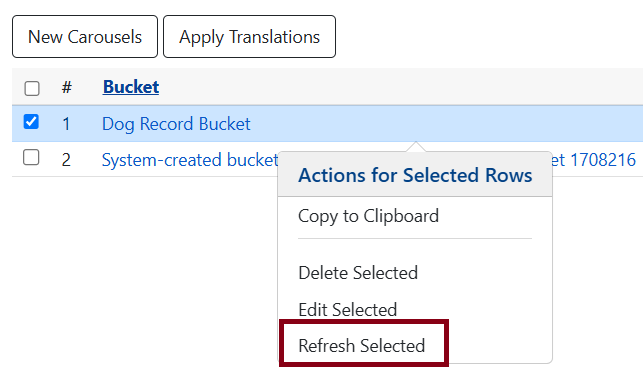
Refreshing Carousels
The “New Items” carousel is refreshed nightly, but if you have added items throughout the day and want that to reflect in the carousel, go to Carousels in Local Admin, then right-click over the carousel and select Refresh Selected. Manual or custom carousels you created cannot be refreshed; this only applies to automated carousels.