Baskets
Baskets are a useful tool for collecting records in the search results. You can do the following actions with baskets:
-
View Basket
-
Print Basket
-
Print basket details
-
Email title details
-
Save items in list
-
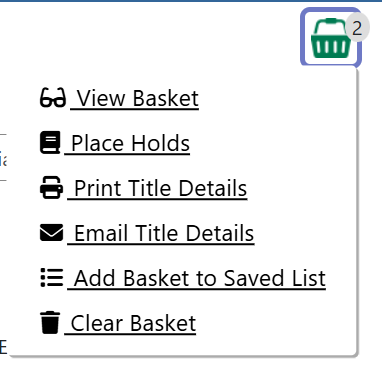
Clear basket
| Baskets should be treated as temporary. Some actions like placing holds, logging out of the catalog, or clearing your browser cookies can clear contents from the basket. If you want to save your searches permanently, click here to view documentation on lists. |
Your basket will be in the top right corner of the search results page. It will keep track of how many items are in there currently with a dropdown list of Basket Actions.
You can add items to the basket with the Add to Basket icon to the right of the icon next to Request Item or select the checkbox on the left.
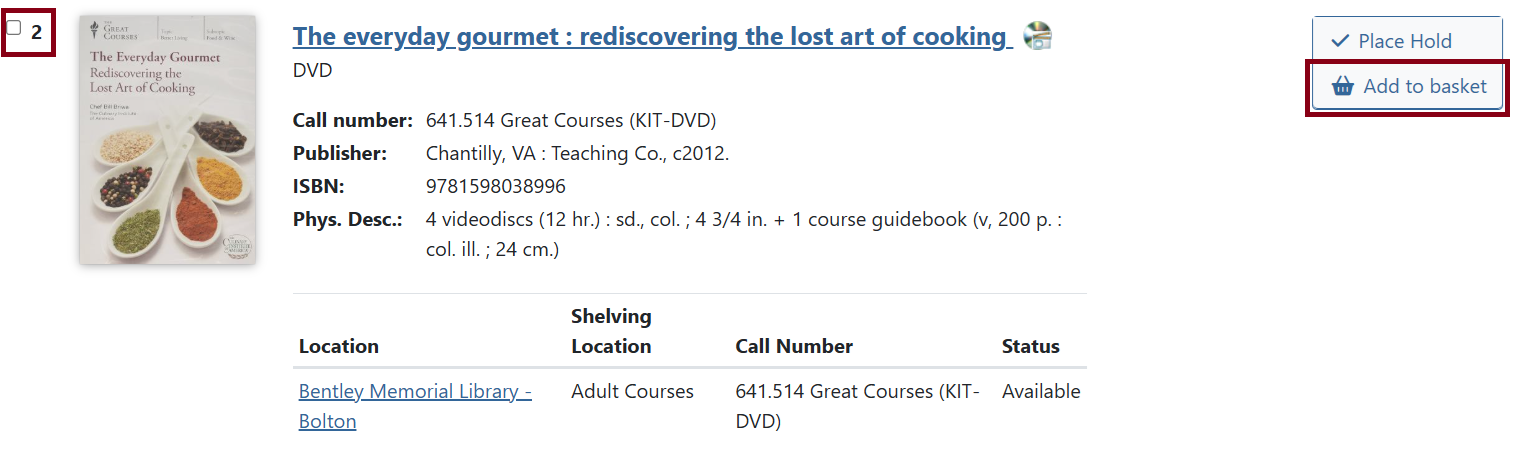
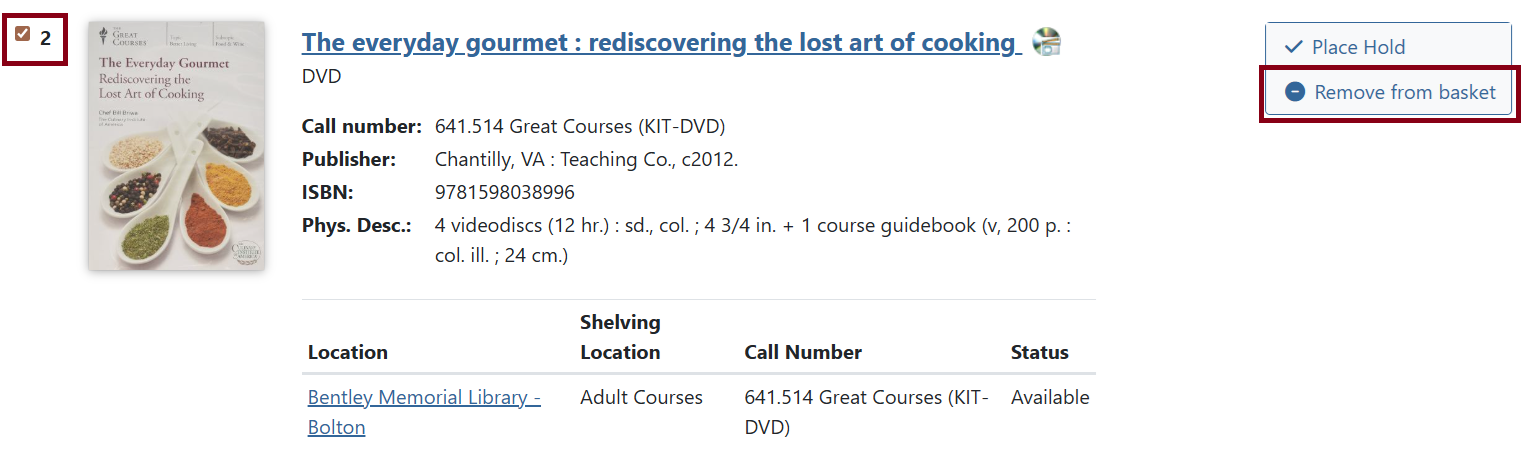
Additionally, you can use the Remove from Basket option for anything that was added that you want to remove or uncheck the box on the left.
View Basket
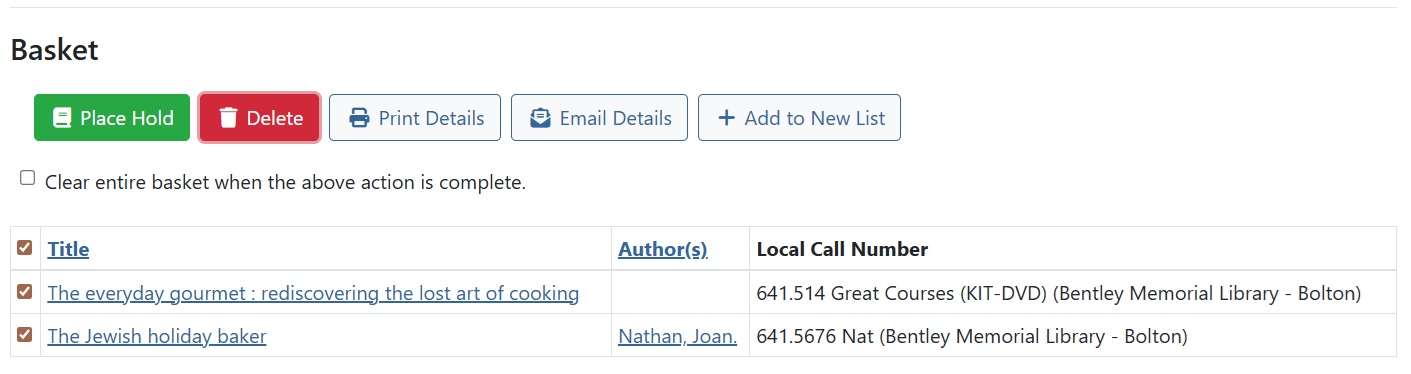
To sort by a column, click on the column title (i.e.: Author(s)) and it’ll sort ascending. Click again to sort descending.
You can also select the items in your basket for further Basket Actions like placing holds, print title details, email title details, remove from basket, or add to a new list.
Place Hold
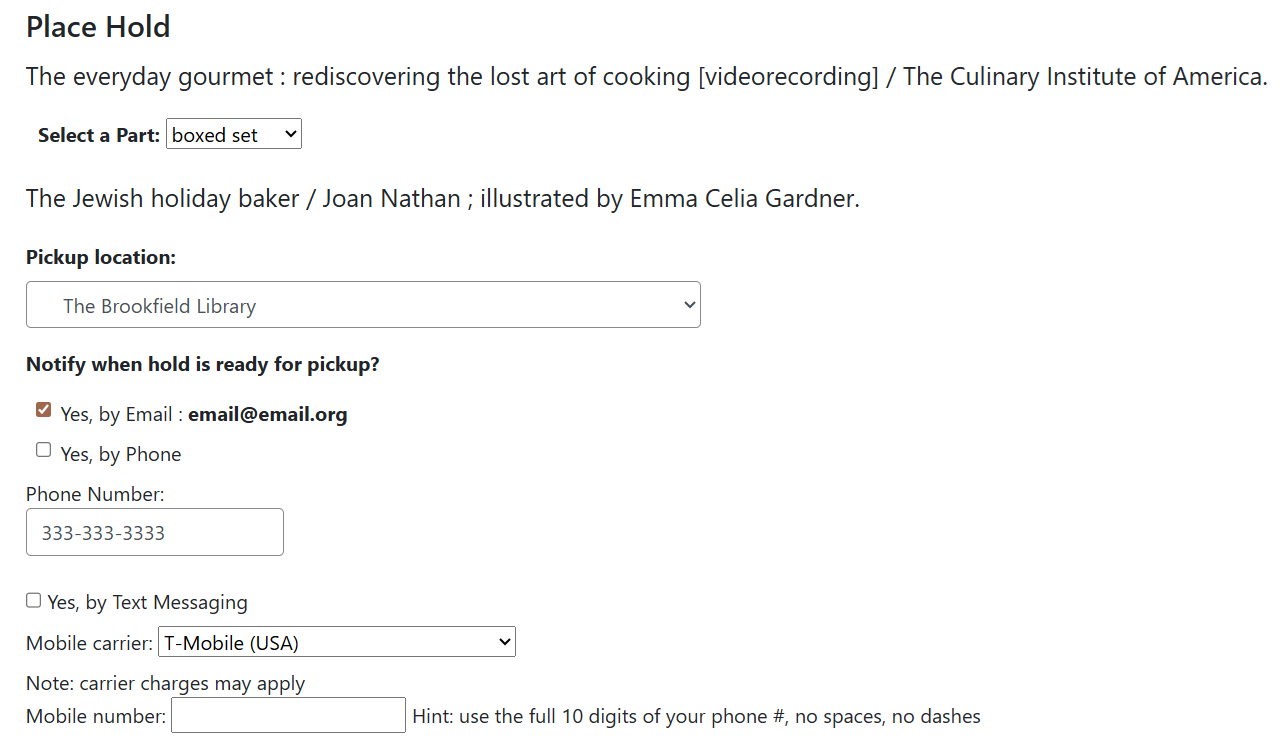
After selecting Place Holds in Basket Actions, a confirmation will appear of the items you want to place holds for. At the bottom is the usual notification confirmation and hold options you would find as if you were to place a hold on an individual item when looking up its record.
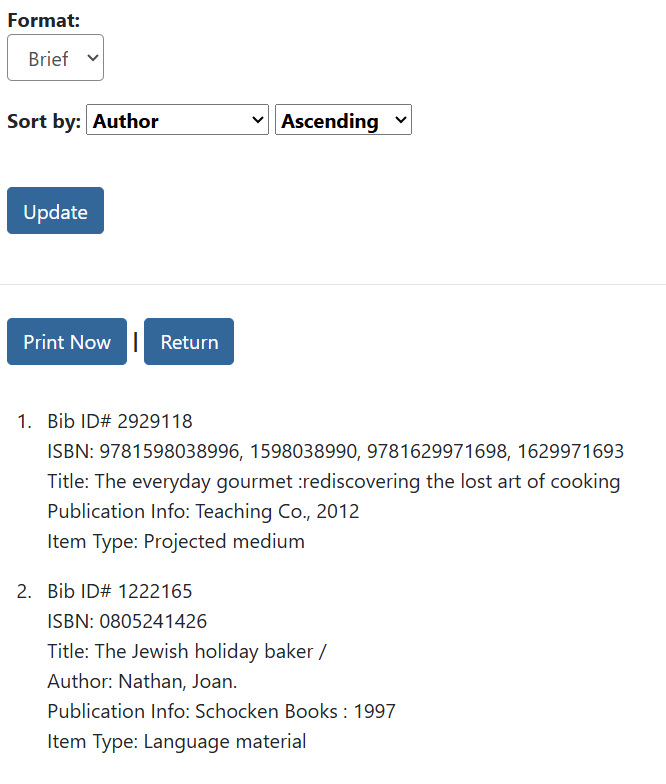
Print Title Details
After choosing Print Title Details, a prompt will ask you to confirm the titles in your basket. You can also clear out the contents of the basket once you’re done printing with the checkbox option.

When printing, you can choose different formats and sort. Make your selections and click Update. When you’re finished configuring, select Print Now or Return to go back.
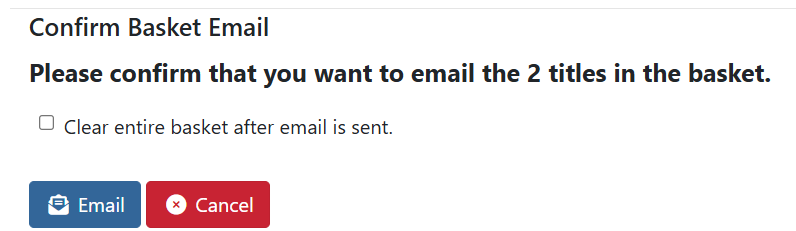
Email Title Details
If you want to send the title information from the basket to yourself, click Email Title Details. You’ll receive the same confirmation prompt that will ask if you want to clear the basket contents before sending an email.
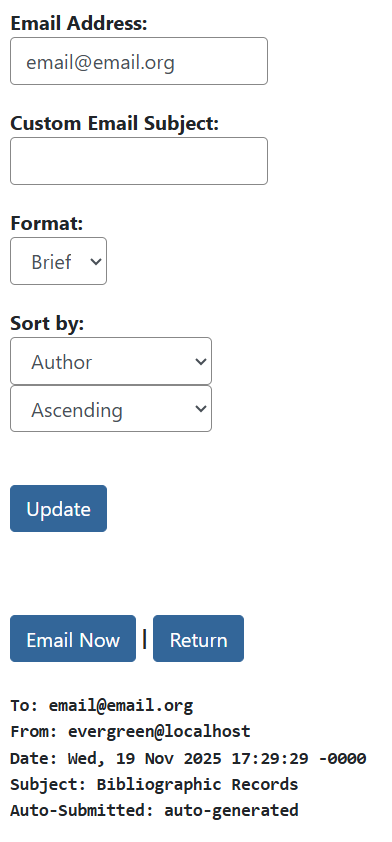
A preview of the email will appear before confirming the email. When logged in, the email address field will autofill with the email saved on your account, but you can edit this if needed. You can also set a custom subject change format, and sort. Click Update when you are done configuring to update the preview.
Click Email Now when ready to send or Return to go back.
Add Basket to Saved List
If you want to save your basket contents permenantly, you can save it to a list. After selecting the option, you’ll be prompted to either create a new list or move selected items to an existing list. Click here for more information on lists.